Baking a cake isn’t just a culinary task – it’s an art, a science, and a way to create something delicious that brings people together. Whether you’re a seasoned baker or a beginner, this guide will take you through the essential steps, offering expert tips, troubleshooting advice, and even a touch of humor along the way.
Let’s begin by diving into the basics and beyond, because there’s a lot to know if you want to bake a cake that not only tastes great but is also a showstopper.
Step 1: Gather Your Ingredients
The first step in baking any cake is to get your ingredients in order. This is often where many people go wrong. Baking is a precise science, and the right ingredients make all the difference. Here’s what you’ll typically need:
- Flour: All-purpose flour is the most common, but some recipes call for cake flour, which has a lower protein content and results in a finer, lighter crumb.
- Sugar: Granulated sugar is most common, but other sugars like brown sugar or powdered sugar may be used depending on the recipe.
- Eggs: Eggs provide structure and moisture. Always use large eggs unless stated otherwise.
- Butter or Oil: Butter gives flavor and richness, while oil can make the cake moist without affecting flavor as much.
- Baking Powder or Baking Soda: These are the leavening agents that help your cake rise.
- Liquid: This could be milk, water, or even fruit juice depending on the cake’s flavor profile.
- Flavoring: Vanilla extract is most common, but don’t be afraid to experiment with almond extract, lemon zest, or even cocoa powder if you’re making a chocolate cake.
It’s essential to use the right measurements for each ingredient. Don’t just eyeball them unless you’re very experienced—this can lead to imbalances in texture or flavor. Always measure with dry measuring cups for dry ingredients and liquid measuring cups for wet ones.
Step 2: Preheat Your Oven
Before you even think about mixing ingredients, get your oven heating. Set it to the correct temperature (usually around 350°F or 175°C for most cakes), and give it time to warm up. A preheated oven ensures that your cake rises properly.
Step 3: Mix the Dry Ingredients
Start by combining your dry ingredients in one bowl—this includes flour, baking powder or soda, salt, and any spices or cocoa powder you plan to use. Whisk them together to ensure they’re evenly distributed. You don’t want lumps of baking powder or a burst of salt in one bite!
Step 4: Cream the Butter and Sugar
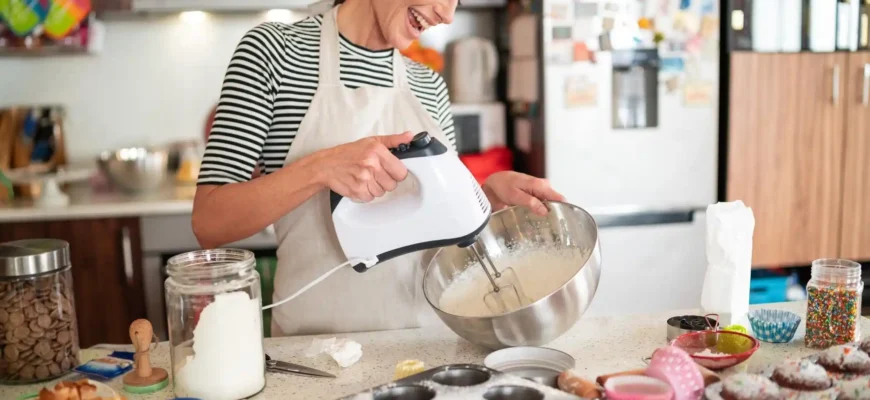
If you’re using butter, the next step is creaming it with sugar. This step is crucial for a light and airy cake. Beat the butter and sugar together until the mixture is light and fluffy. This can take 3–5 minutes with an electric mixer. If you skip this step, your cake will be dense.
Step 5: Add Eggs and Flavorings
Once the butter and sugar are properly creamed, add in your eggs one at a time, beating well after each addition. This helps incorporate air into the batter, contributing to the cake’s rise. If you’re adding vanilla or any other flavoring, now’s the time.
Step 6: Alternate Adding Dry Ingredients and Wet Ingredients
Now it’s time to combine the wet and dry ingredients. Start by adding about a third of your dry mixture to the butter-sugar-egg mixture. Mix until just combined, then add a third of the liquid (milk, water, etc.). Repeat this process, alternating between the dry and wet ingredients, until everything is incorporated. Be careful not to overmix, as this can lead to a tough cake.
Step 7: Pour the Batter Into Your Pan
Once your batter is mixed, it’s time to pour it into the prepared baking pan. Use parchment paper or grease the pan with butter and flour to prevent sticking. If you’re using a cake pan with multiple layers, divide the batter evenly between them.
Step 8: Bake!
Place your cake in the preheated oven and bake according to the recipe instructions. The general baking time is anywhere from 25 minutes to an hour, depending on the size of the cake and the temperature. To test for doneness, insert a toothpick into the center of the cake. If it comes out clean or with a few crumbs, it’s done!
Step 9: Let It Cool
Once the cake is done, take it out of the oven and let it cool in the pan for about 10 minutes. After that, remove it from the pan and let it cool completely on a wire rack. Don’t skip this step—it helps prevent the cake from falling apart when you try to frost or cut it.
Step 10: Frost and Decorate
Now the fun part: frosting! You can use a simple buttercream frosting, cream cheese frosting, or any other frosting you like. A smooth layer of frosting can turn a good cake into a great one. For decoration, you can add sprinkles, fresh fruit, or even edible flowers for a touch of elegance.
Tips and Troubleshooting
- Cake too dry? This could be due to overbaking, incorrect measurements, or not enough fat. Try adding a little more butter or oil next time, and make sure to check your cake a few minutes before the suggested baking time is up.
- Cake too dense? Overmixing can cause this. Once you add the flour, mix until just combined. If you’re making a delicate cake, try sifting your dry ingredients.
- Cake stuck to the pan? Make sure you grease your pan well and line it with parchment paper. If you’re unsure, you can dust the greased pan with flour to create an extra layer of protection.
Cake Variations
There are endless possibilities when it comes to cakes. Here are a few variations you can try:
- Chocolate Cake: Add cocoa powder to the dry ingredients and increase the sugar a little. You can also fold in chocolate chips for extra richness.
- Fruit Cake: Add diced fruits, like apples or berries, or fold in pureed fruits like banana for flavor.
- Gluten-Free Cake: Use a gluten-free flour blend, and be sure to check that all your other ingredients (such as baking powder and extracts) are also gluten-free.
Common Mistakes and How to Avoid Them
- Under-mixing: Don’t skimp on mixing the wet ingredients thoroughly before adding the dry. You want to make sure the batter is smooth and evenly incorporated.
- Over-baking: Always set a timer and check the cake with a toothpick 5–10 minutes before the suggested time. Ovens vary, and you don’t want to risk drying out your cake.
- Not following the recipe: Baking is all about precision. Skipping steps or changing measurements can throw off your results. If you’re feeling adventurous, tweak the recipe a little—but know that it might not turn out exactly as planned.
Opinions from People Around the World
Maria (Age 34, Mexico): “Baking is an art form in my family, and I’ve learned the importance of being precise. I’ve had my fair share of failures, especially with my first chocolate cake. It was like a brick. But I learned from it—never skip the creaming step! And don’t be afraid of adding a little extra vanilla, it makes everything better.”
John (Age 62, USA): “I’ve been baking cakes for over 40 years. The best tip I can give anyone is this: don’t rush the cooling process. Let your cake cool completely before frosting it. Otherwise, you’ll have a melted mess on your hands. And remember, cake is supposed to be fun! Don’t stress over perfect results—just enjoy the process.”
Sita (Age 45, India): “In our home, we make cakes for every celebration, whether it’s Diwali or a birthday. I’ve found that the best cakes are those made with love and patience. Don’t cut corners, and use the best ingredients you can find. Also, don’t forget to add a pinch of cardamom—it adds a wonderful touch!”
Tomo (Age 28, Japan): “I prefer lighter, sponge-like cakes, and I’ve learned that the trick is in the folding technique. No overmixing, just gently incorporate the flour. And always sift your dry ingredients. Trust me, it makes a difference.”
Lina (Age 56, Sweden): “Baking a cake is always a calming activity for me. The most important part? Quality butter. It’s worth spending a little more on real butter because it really shines in your cake. And be sure to test the cake’s doneness early—no one likes a dry cake!”
Conclusion
Baking a cake is a rewarding experience, whether you’re making it for a special occasion or just because you’re craving something sweet. By following these steps, avoiding common pitfalls, and adding your own personal touches, you’ll be on your way to creating cakes that not only taste amazing but also bring joy to everyone who shares in the experience.
Happy baking! 🎂


