
Ah, red velvet cake—the very name conjures up visions of rich, velvety texture and that striking red hue. It’s a cake that’s been around for generations, captivating taste buds with its delicate balance of sweetness and slight tang, all wrapped in a plush, cream cheese frosting. But let’s be real: it’s also a cake that raises a lot of questions. Why is it red? What gives it that subtle cocoa flavor? And, perhaps most pressing of all—how do we make it just right?
This guide is here to answer all of that, and much more. I’m not just going to throw a recipe at you; I’m going to walk you through everything you need to know about red velvet cake, including its history, variations, tips, and potential pitfalls. So, if you’ve ever wanted to create the perfect red velvet masterpiece (or simply satisfy your curiosity), pull up a chair. You’re in for a treat!
The Origins of Red Velvet Cake
First, let’s talk about where red velvet cake came from. Despite its luxurious appearance, the red velvet cake was originally quite humble. The cake dates back to the early 20th century, gaining popularity in North America, particularly in the Southern United States. The deep red color likely came from the use of natural cocoa powder and acidic ingredients like vinegar or buttermilk, which can react to intensify the color. Back then, it wasn’t so much about the color as it was about the texture—red velvet cake is famously soft and moist.
The cake’s dramatic red color, however, became more consistent and vibrant when food coloring (specifically, red dye) was introduced to the recipe in the 1920s. This red color has become iconic, and while many might wonder whether it’s “natural,” the truth is, today’s red velvet cakes are often tinted with synthetic red dye to achieve that distinct, eye-popping shade.
Key Ingredients for Red Velvet Cake
To bake the perfect red velvet cake, you’ll need a few key ingredients that help give the cake its unique flavor and texture:
- Cake Flour: This is essential for that soft, fine crumb texture. Regular all-purpose flour might make the cake denser, so stick to cake flour if you want the authentic velvet feel.
- Cocoa Powder: While red velvet cake isn’t a chocolate cake, it does contain cocoa powder. A small amount adds a subtle richness and depth of flavor without being overpowering.
- Buttermilk: This is crucial for the tangy flavor that defines red velvet. The acidity of buttermilk also reacts with the cocoa powder to enhance the color.
- Vinegar: White vinegar or apple cider vinegar helps activate the baking soda, contributing to the light, airy texture and tender crumb.
- Butter or Oil: Both work to add moisture and richness, but oil tends to make the cake even more moist and tender.
- Eggs: Eggs provide structure and moisture, binding all the ingredients together.
- Red Food Coloring: While you can use beet juice as a natural alternative, most recipes today call for food coloring (liquid or gel) to achieve the iconic red hue.
Pro Tip:
Many recipes call for a significant amount of food coloring, but if you’re looking for a more natural, less synthetic approach, consider beetroot juice. It gives you the red color, plus some extra nutrients. But be aware, the color might not be as vibrant as with artificial dye, so keep that in mind!
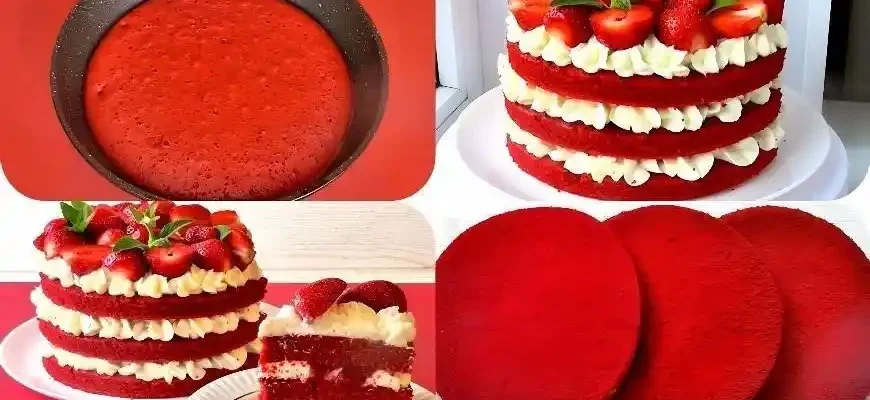
Making Red Velvet Cake: Step-by-Step
Now, let’s get to the fun part—the actual baking! Here’s how you can make your own red velvet cake from scratch:
Ingredients:
- 2 ½ cups of cake flour
- 1 ½ cups of granulated sugar
- 1 teaspoon of baking soda
- 1 tablespoon of unsweetened cocoa powder
- 1 teaspoon of salt
- 1 ½ cups of vegetable oil (or melted butter)
- 1 cup of buttermilk, at room temperature
- 2 large eggs, at room temperature
- 2 tablespoons of red food coloring (or beetroot juice)
- 1 teaspoon of vanilla extract
- 1 teaspoon of white vinegar
Instructions:
- Preheat the oven: Set your oven to 350°F (175°C). Grease and flour two 9-inch round cake pans.
- Dry ingredients: In a large bowl, sift together the cake flour, sugar, baking soda, cocoa powder, and salt. This ensures all the dry ingredients are evenly distributed.
- Wet ingredients: In a separate bowl, whisk together the buttermilk, eggs, oil, vanilla extract, and red food coloring. Add the vinegar last—this will react with the baking soda to give your cake a light, fluffy texture.
- Combine: Gradually add the wet ingredients to the dry ingredients, mixing just until combined. Avoid overmixing, as this could result in a dense cake.
- Bake: Divide the batter evenly between the two cake pans and bake for 25-30 minutes, or until a toothpick inserted in the center comes out clean.
- Cool: Allow the cakes to cool in the pans for about 10 minutes before transferring them to a wire rack to cool completely.
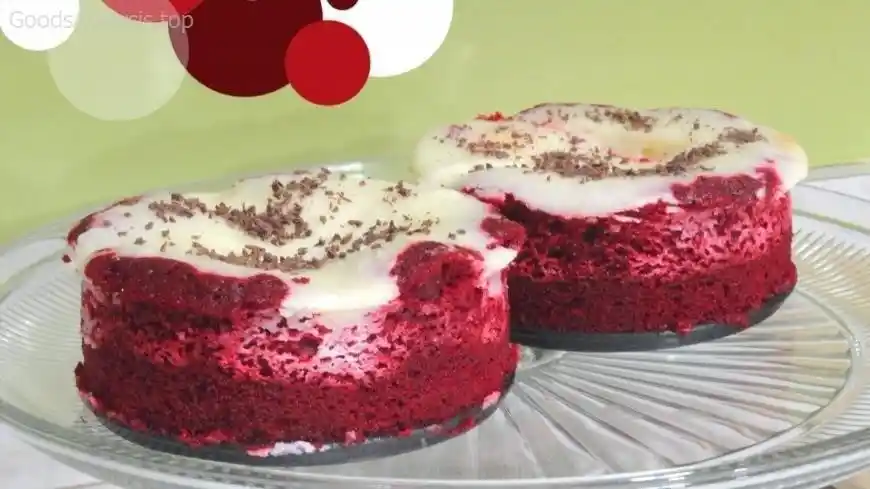
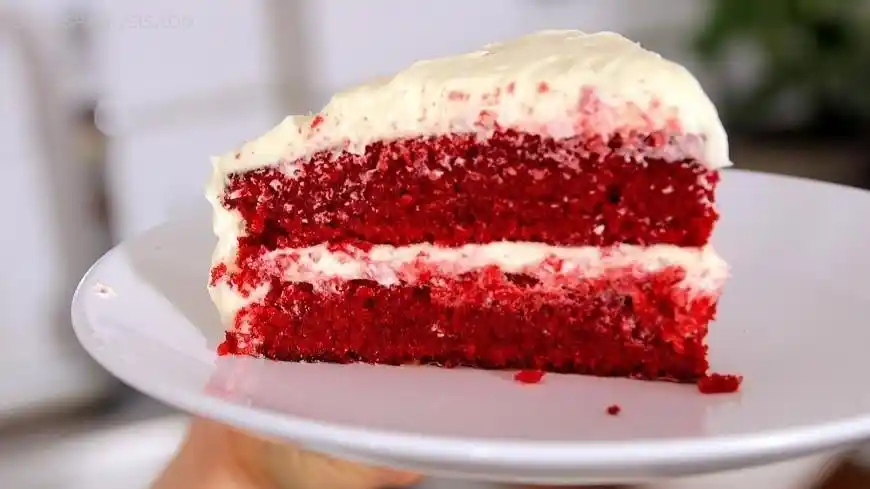
- Frost: Once cooled, frost the cake with your favorite cream cheese frosting or buttercream (more on this in a minute).
Quick Frosting Tip:
You can whip up a quick frosting by beating together 8 oz cream cheese, ½ cup butter, and 1 ½ cups powdered sugar until smooth and creamy. Add vanilla extract and a pinch of salt for extra flavor.
Potential Pitfalls & How to Solve Them
While red velvet cake seems simple enough, there are a few potential hiccups you might face. Here’s a quick troubleshooting guide:
- Dry Cake: If your cake turns out dry, it could be due to overbaking, incorrect measurements, or using too much flour. Make sure you measure the flour correctly (use the spoon-and-level method) and bake just until a toothpick comes out clean.
- Flat Cake: If your cake is too flat, you may have used expired baking soda, or you might have under-mixed the batter. Both of these can prevent the cake from rising properly.
- Fading Color: If the red color fades, it could be because you’re using too much or too little food coloring, or you’re not using enough acidity (buttermilk and vinegar help maintain the color). You can also try gel food coloring for a more intense, long-lasting color.
People’s Opinions on Red Velvet Cake
Let’s hear from a few folks around the world about their love (or confusion) around red velvet cake:
- Maria, 58, USA: “I’ve been baking for decades, and red velvet cake has always been my go-to for special occasions. I’ve tried the beetroot version, but nothing beats the vibrant color and flavor of the classic food coloring. People love it every time.”
- Anish, 35, India: “I was skeptical about red velvet cake at first. The whole concept of a cake being both sweet and tangy was strange. But once I tried it, I understood the appeal. It’s not too rich, and the cream cheese frosting is perfect.”
- Liu Wei, 24, China: “Red velvet is a bit of an oddity here, but I had it once at a bakery in the US. The color is eye-catching, and I love the soft texture. Honestly, though, I’d probably stick with chocolate cake. It’s a bit more my style.”
- Javier, 45, Spain: “I’m not a big fan of overly sweet cakes, but red velvet offers a nice balance. The slight tang from the buttermilk makes it feel lighter than other cakes, and the cream cheese frosting is a dream. It’s a rare treat, but worth the wait.”
- Aya, 61, Japan: “I’m more into traditional Japanese sweets, but when I had red velvet cake for the first time, I was impressed. It’s so visually appealing and surprisingly light. I would love to try making it at home.”
Conclusion: Why You Should Try Baking Red Velvet Cake
Whether you’re a seasoned baker or someone trying your hand at cake-making for the first time, red velvet cake is a recipe worth mastering. It’s not just about the color or the flavor—it’s about the experience of creating something that’s as visually stunning as it is delicious. And while there are a few quirks to keep in mind, with a little care and attention, you can easily avoid common mistakes and turn out a perfect red velvet cake every time.
So, don’t be afraid to dive in! Try it out, have some fun with it, and maybe share the love with friends and family. And if something goes awry, well, that’s just part of the adventure. After all, cake is meant to be enjoyed, flaws and all!


