
Drawing an elephant, one of the most majestic creatures on the planet, is no easy task. But with a little guidance, patience, and practice, you can transform your blank page into a work of art that captures the grandeur and grace of these magnificent animals. Whether you’re a novice looking to learn how to sketch an elephant or an experienced artist refining your techniques, this guide will provide you with everything you need to know.
I’m going to walk you through the process step-by-step, share useful tips and tricks, and give you some insights into the biology and proportions that will help you draw an elephant that feels both authentic and lifelike.
1. Understand the Elephant’s Anatomy
Before you even pick up your pencil, it’s crucial to get a basic understanding of the elephant’s anatomy. Elephants are large, heavy animals with distinct body features that set them apart from other wildlife. Here’s a quick overview of their physical characteristics:
- Size and Proportions: Adult elephants can stand over 10 feet tall and weigh anywhere between 3,000 and 6,000 kg (6,600 to 13,200 pounds). Understanding their large, bulky frame is essential for accurate drawing.
- Head and Trunk: An elephant’s trunk is one of its most iconic features. It’s a long, flexible extension of its upper lip and nose. The trunk is not just a “nose”—it’s used for a variety of purposes like feeding, drinking, and even socializing.
- Ears: Elephants have large, fan-like ears. African elephants have larger ears than Asian elephants, and their ears are shaped somewhat like Africa on a map.
- Tusks: Both African and Asian elephants have tusks, although in Asian elephants, only the males typically have large tusks. These tusks are elongated incisor teeth.
- Body Shape: Elephants have large, round bodies with relatively short legs. Their skin is thick, wrinkled, and covered in sparse hair.
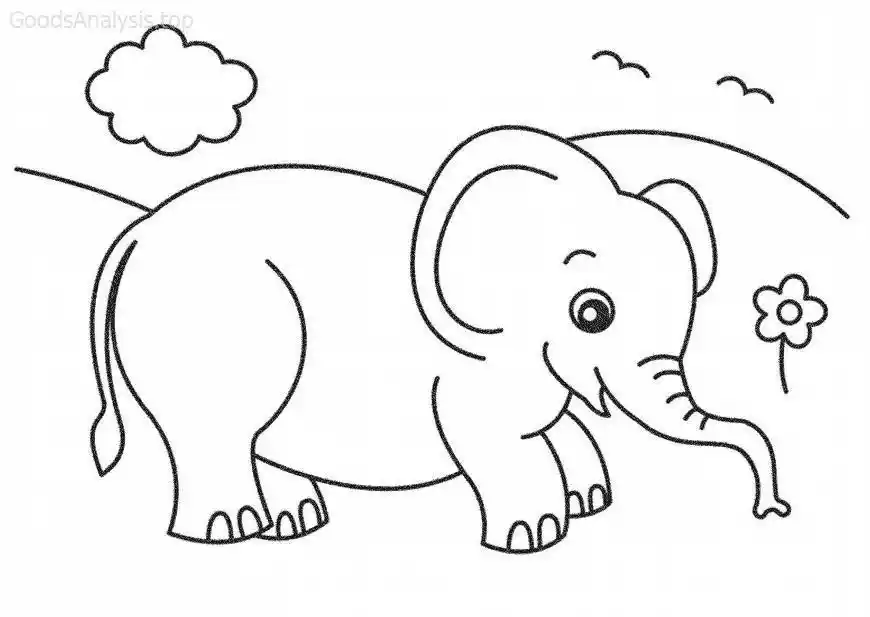
2. Basic Sketching: Getting the Proportions Right
Start by drawing the elephant’s basic structure using simple shapes. This is the skeleton of your drawing, so don’t worry about details just yet. The key is to get the proportions right so that the rest of the drawing flows naturally.
- Head and Body: Draw a large oval for the body and a smaller circle for the head. The distance between the two should be in proportion—elephants’ heads are large but not overly so compared to their massive bodies.
- Trunk: Sketch a long, curved line extending from the head for the trunk. Keep in mind that the trunk is a complex structure, so you’ll want to break it down into segments at first.
- Legs and Feet: Draw four long, straight lines for the legs. Elephants have relatively short legs for their body size, but they are thick and sturdy. Their feet are wide and flat, so make sure to include that in your design.
3. Refine Your Sketch: Adding Detail
Once your basic shapes are in place, it’s time to refine your drawing. Here’s where you begin adding the unique features that make an elephant so recognizable.
- Trunk Detail: The trunk is the elephant’s most complex feature. Start by adding horizontal lines along the trunk to suggest its segments. Elephants’ trunks have a lot of muscle, so they can bend and curl in multiple directions. Add some curves to reflect this flexibility.
- Ears: Shape the ears so that they appear large and floppy. African elephant ears are shaped like the African continent, while Asian elephant ears are more rounded.
- Tusks: For elephants that have tusks, draw them extending outward from the sides of the trunk. The tusks should be long and slightly curved. They can be a bit more complex to draw because they have texture and curve as they extend outward.
- Body Details: Begin shaping the elephant’s massive body, adding wrinkles to the skin and small details like the folds where the skin bends. Pay close attention to the way the elephant’s skin moves with the body; these creatures are covered in deep wrinkles and folds.
- Feet and Legs: Elephants’ legs are thick and muscular. You’ll want to make sure the feet are wide and flat with distinct toes. Add lines to suggest the thick skin that makes up their feet.
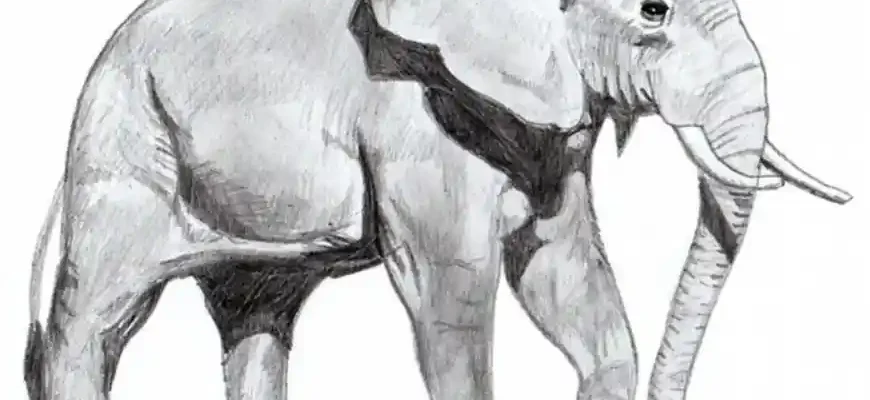
4. Shading and Final Details
This is the stage where your drawing starts to come alive. Adding shading will help create depth and make your elephant appear three-dimensional.
- Light Source: First, decide where the light is coming from. Typically, light will come from above, which means the underside of the elephant’s body, trunk, and legs will be darker.
- Shading: Use a softer pencil (such as a 2B or 4B) to add darker shadows. Shade around the folds of skin, beneath the trunk, and on the underside of the body. Keep your shading smooth and gradual to reflect the soft texture of an elephant’s skin.
- Details: Go back to add smaller details like the eye, tail, and the wrinkles that give the elephant its character. Don’t forget to use different pressure in your pencil to create contrast between light and dark areas.
5. Common Mistakes and How to Avoid Them
Drawing an elephant may seem straightforward, but there are some common pitfalls that new artists often fall into. Let’s address a few of them:
- Incorrect Proportions: One of the biggest mistakes when drawing an elephant is not getting the proportions right. Elephants have a large body with short, sturdy legs. If the legs are too long or the body too small, the elephant will look out of balance.
- Solution: Always use reference images and check your proportions regularly while you’re drawing.
- Over-Simplification of the Trunk: The trunk is more than just a “nose” on a long tube. It has muscle, segments, and a flexible structure that needs to be represented properly.
- Solution: Break the trunk down into simpler shapes first, then refine them. Add curves and creases to reflect its flexibility and complexity.
- Ignoring Textures: Elephants have thick, wrinkled skin that gives them their distinctive look. It’s easy to ignore or simplify this texture, but it’s essential for a realistic drawing.
- Solution: Pay attention to how the skin folds around joints and muscles. Use a variety of pencil pressures to add texture and depth.
6. Conclusion
Drawing an elephant is a rewarding experience that allows you to study one of nature’s most magnificent creatures up close. By breaking the process down into manageable steps, from understanding the anatomy to adding final shading, you can create a drawing that captures the essence of these gentle giants.

Remember, like any form of art, practice makes perfect. The more you draw, the more you’ll refine your technique and develop your own style. Don’t rush through the steps—take your time, and you’ll be able to create a stunning elephant drawing that reflects your skill and understanding of the animal.
Opinions from People Around the World
- Olivia (New York, USA, 34): “I’ve been drawing animals for years, and elephants are always a challenge. This guide really helped me focus on the trunk’s structure, something I had never paid much attention to before. I’ll definitely be practicing this more.”
- Said (Cairo, Egypt, 58): “As an artist who specializes in wildlife, elephants are both a joy and a challenge. The tips on shading and understanding their proportions were very insightful. I’m looking forward to sharing this with my students!”
- Maria (São Paulo, Brazil, 42): “I never realized how important the ears are in creating a realistic elephant. It’s the detail that makes the difference. Thanks for breaking it down step by step—I’m inspired to try again.”
- Darren (London, UK, 50): “Great article! I love how you emphasized the trunk and body textures. As someone who loves sketching animals but is still learning, this guide gave me the confidence to tackle something as complex as an elephant.”
- Yuki (Tokyo, Japan, 25): “I’ve been drawing elephants for years, but I always struggled with their legs. This guide really helped me with the details and proportions. I now feel more confident tackling such a huge animal in my sketches.”
This guide is just the beginning of your journey toward mastering elephant sketches. Keep practicing, and don’t forget to have fun with the process.


