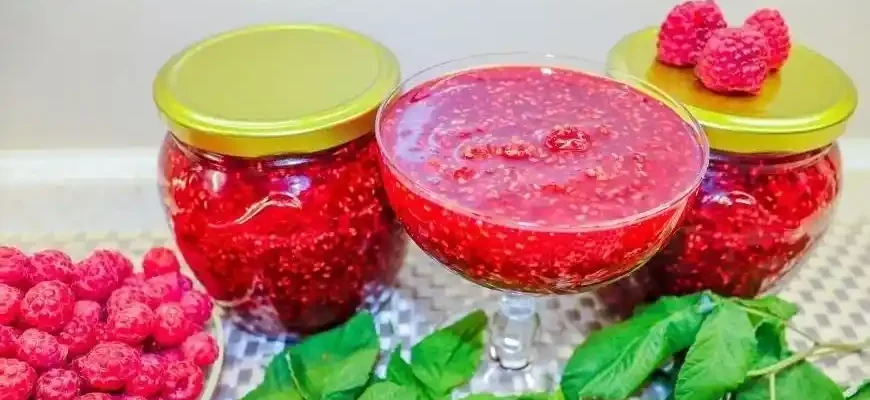
Making raspberry jam is one of those timeless kitchen activities that can warm your heart and make your home smell like summer. Whether you’re an experienced home cook or a beginner looking to try something new, making raspberry jam is a rewarding experience. But, like anything, it’s good to have a bit of knowledge before you begin. Here, I’ll walk you through everything you need to know about making raspberry jam, from the basics to more advanced tips, and even some things you might not have thought of.
What You’ll Need for Raspberry Jam
Before diving in, let’s start with the ingredients and tools you’ll need. The beauty of raspberry jam is its simplicity. All you need are a few basic ingredients and some patience. Here’s what you’ll need:
Ingredients:
- Fresh raspberries (about 4 cups)
- Sugar (4 cups, yes, it’s a lot, but it’s necessary for both sweetness and preservation)
- Lemon juice (2 tablespoons, to balance the sweetness and help with setting)
- Pectin (optional, but it helps the jam set better)
Tools:
- A large pot (a heavy-bottomed one works best)
- A wooden spoon (to stir the jam without damaging the fruit)
- Canning jars (sterilized)
- A ladle
- A thermometer (optional, but it’s useful for getting the right jam consistency)
Step-by-Step Guide to Making Raspberry Jam
- Prepare the Raspberries
Wash your raspberries thoroughly, picking out any stems or leaves. The beauty of raspberries is that they’re delicate, so handle them gently to avoid mashing them prematurely. You want to keep those beautiful, plump berries intact as much as possible. - Cook the Raspberries
Put the raspberries in your pot and start cooking them on medium heat. Stir them often, using your wooden spoon to gently mash some of the fruit as it cooks. This will help release the juices. Once the fruit has softened and broken down, it’s time for the sugar. - Add Sugar and Lemon Juice
Once your raspberries are all mashed up, add the sugar and lemon juice to the mix. Stir constantly to dissolve the sugar, ensuring that no crystals remain. The acidity from the lemon juice is crucial—it helps balance the sweetness and, even more importantly, it assists in the jam setting properly. - Cook Until It Sets
Bring your jam mixture to a boil and keep stirring. As it heats up, the sugar will dissolve, and the fruit will begin to thicken. You can use a thermometer to check the temperature. Raspberry jam is done when it reaches around 220°F (104°C). If you don’t have a thermometer, you can test the jam by placing a small spoonful on a cold plate and letting it cool for a few seconds. Run your finger through the jam; if it wrinkles and doesn’t immediately run back together, it’s ready. - Can the Jam
Once your jam has reached the perfect consistency, remove it from the heat. Let it cool slightly before ladling it into sterilized jars. Make sure to leave about a half-inch of space at the top of each jar. Seal the jars while the jam is still hot, and then process them in a water bath for 5-10 minutes to ensure proper sealing. - Let It Set
After canning, let your raspberry jam sit for 24 hours before opening. This gives it time to fully set and achieve that perfect spreadable consistency.
Tips for the Best Raspberry Jam
- Use ripe raspberries: Fresh, ripe raspberries yield the best flavor. Overripe berries will often become mushy and don’t provide the same vibrancy.
- Be patient: Jam-making can take time, especially in terms of cooking and setting. But this is not a quick project—good things come to those who wait.
- Test for pectin: If you’re using store-bought raspberries, they may not contain enough natural pectin. In that case, adding powdered pectin can help your jam thicken properly.
- Mind the sugar: Yes, you need sugar, but if you’re watching your sugar intake, you can experiment with sugar substitutes (although this may affect both texture and taste). For a healthier option, you can reduce the sugar or try honey, although this will change the flavor profile of the jam.
Potential Pitfalls and How to Solve Them
- Jam not setting: If your jam doesn’t set properly, it could be due to undercooking, not enough pectin, or a higher water content in your raspberries. If this happens, you can reheat the jam and cook it for a little longer, or add more pectin.
- Overcooked jam: If your jam gets too thick, don’t panic—it’s not the end of the world! You can always thin it out by adding a bit of water or fruit juice, though it will affect the flavor slightly.
- Sealing problems: If your jars don’t seal properly after canning, don’t just toss them out. You can store the unsealed jars in the fridge and use the jam sooner, or you can reprocess them.
The Health Benefits of Raspberry Jam
You might think that raspberry jam is just a sweet indulgence, but it does have some surprising health benefits. Raspberries are rich in antioxidants, fiber, and vitamin C, and they contain polyphenols that may help reduce inflammation and support heart health. Of course, jam is still sugar-heavy, so it’s best enjoyed in moderation.
Important Note: If you’re making jam at home, you can control the sugar content, which is a big win for anyone concerned about their sugar intake. Just keep in mind that reducing sugar too much may affect the texture and preservation of the jam.
Raspberry Jam Around the World
Raspberry jam isn’t just a beloved treat in North America and Europe. It’s popular in many countries, each with its own slight twist on the recipe. For example, in Russia, raspberry jam is often paired with tea, while in Scandinavia, it’s a common topping for cakes and pastries. In the UK, raspberry jam is often used to fill scones in a traditional afternoon tea.
Voices from Around the World
Here are a few opinions from real people who’ve made raspberry jam themselves, each with their unique perspective:
- Sophia, 34, USA (New York): “I love making jam with my daughter. It’s a great way to teach her about the seasons and where food comes from. Raspberry jam is our favorite, but I always add a dash of vanilla to make it a little different.”
- Liam, 55, UK (Manchester): “I’ve been making raspberry jam for years, and I swear by the old-school method of cooking it slowly. I don’t use pectin—just good ripe fruit, sugar, and patience. It’s more effort, but the result is so worth it.”
- Aiko, 42, Japan (Tokyo): “In Japan, we don’t have as many raspberries as other countries, but I’ve managed to find them at specialty stores. I make small batches, adding less sugar to preserve the natural taste of the raspberries.”
- Carlos, 28, Spain (Barcelona): “Raspberry jam isn’t something I grew up with, but I’ve come to love it after trying it at a friend’s house. It pairs perfectly with fresh bread and cheese, and I’ve even used it in pastries.”
- Lina, 61, Sweden (Stockholm): “In Sweden, we make raspberry jam in the summer when the berries are in season. It’s the highlight of the year for me, and I love giving it as gifts to family and friends.”
Conclusion
Making raspberry jam is an act of patience, but it’s so worth it when you get that first spoonful. Whether you’re using it on toast, as a topping for desserts, or just enjoying it by the spoonful, raspberry jam brings a little bit of sunshine to any day. Remember, like any craft, the more you make it, the better you’ll get at it. And, don’t forget, it’s always nice to share your homemade jam with friends and family!
Now go on—grab those raspberries, roll up your sleeves, and get cooking. Sweet, tangy perfection is just a few steps away.


