
Ah, onion rings. Whether you’re serving them as a crispy snack, a side dish, or an appetizer, these golden, crunchy delights hold a special place in the hearts of many. But, as anyone who’s ever tried to make them at home knows, getting that perfect balance of crispiness without the greasy mess is a tricky task. But don’t worry – I’ve got your back! Having spent decades experimenting with and refining onion ring recipes, I’m here to share the tips, tricks, and science behind making the ultimate onion rings.
The Anatomy of the Perfect Onion Ring
At their core, onion rings are simple: onions, batter, and oil. However, it’s the precise handling of these elements that transforms a soggy, limp ring into a crispy masterpiece. To get things just right, you need to consider the following:
- Choosing the Right Onion
The first step in the onion ring process is selecting the right kind of onion. While you can use any variety, yellow onions are generally preferred for their balance of sweetness and sharpness. Vidalia onions, a type of sweet onion, are also an excellent choice if you want a milder taste. - Cutting the Onion
The thickness of your onion rings plays a significant role in their final texture. Aim for rings that are about 1/4 to 1/2 inch thick. If they’re too thin, they might burn too quickly; too thick, and they won’t crisp up as much as you’d like. - Batter or Breading?
Here’s the age-old debate: batter vs. breading. Both methods can produce great onion rings, but they do so in different ways:
- Battered Onion Rings: These are typically lighter and fluffier. The batter is usually made with flour, cornstarch, salt, and a liquid like buttermilk, beer, or water.
- Breaded Onion Rings: These rings have a crunchier, more substantial coating. You dip the onion in egg wash and then coat it with breadcrumbs or panko before frying. Both options are delicious, but the batter method tends to be easier to manage for beginners, while breading offers a more robust crunch.
- The Secret Ingredient: Cornstarch
Many professional chefs swear by adding a bit of cornstarch to their batter. Why? Cornstarch helps absorb moisture and creates a crispier texture. Just a tablespoon or two in your batter can make a world of difference. - Temperature of the Oil
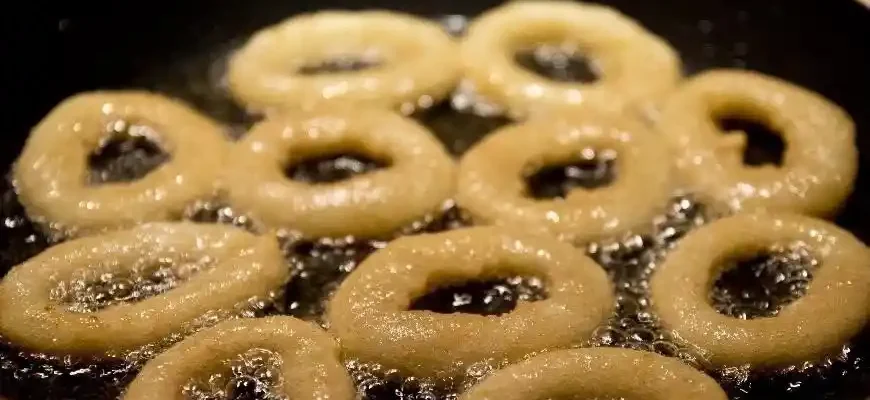
Oil temperature is critical to the success of your onion rings. Too hot, and your onion rings will burn on the outside while staying raw inside. Too cool, and they’ll soak up the oil and turn greasy. The sweet spot is between 350°F and 375°F (175°C – 190°C). A deep-frying thermometer is your best friend here. If you don’t have one, drop a small bit of batter into the oil. If it sizzles immediately but doesn’t burn, you’re in the right range. - Frying the Onion Rings
Frying should be done in small batches to avoid overcrowding the pan. Overcrowding lowers the oil temperature and leads to soggy, oily onion rings. Fry each batch for 2-4 minutes or until golden brown, turning them halfway through to ensure even cooking. - Draining and Serving
Once your onion rings are fried to perfection, place them on a paper towel-lined plate to drain excess oil. This helps maintain their crispiness.
The Best Dipping Sauces
While onion rings are delicious on their own, a good dipping sauce can take them to the next level. Here are a few classic and creative options to try:
- Classic Ketchup: You can’t go wrong with the old stand-by.
- Ranch Dressing: The creamy, tangy flavor pairs perfectly with crispy rings.
- Spicy Mayo: A bit of sriracha mixed with mayo gives a nice kick.
- BBQ Sauce: For a smoky, tangy flavor, BBQ sauce is always a winner.
Potential Pitfalls and How to Avoid Them
Making onion rings is easy in theory but can lead to some frustrating results if not done right. Here are some common problems and solutions:
- Greasy Rings: If your onion rings are greasy, it likely means your oil wasn’t hot enough when you fried them. Make sure you monitor the oil temperature closely and don’t overcrowd the pan.
- Batter Falling Off: If your batter isn’t sticking to the onions, try dusting the onion slices with a little flour before dipping them in the batter. This helps the batter adhere better.
- Onion Rings Not Crispy: If your rings aren’t crispy, you may need to adjust the batter consistency or make sure your oil is hot enough. Also, consider double-dipping your onion rings in the batter for an extra layer of crunch.
- Onions Burning: If your onions are burning before the batter cooks through, your oil may be too hot. Lower the heat slightly and test with a small piece of onion to ensure it cooks evenly.
Health Considerations and Alternatives
While onion rings are undeniably delicious, they’re not the healthiest snack, especially when deep-fried. However, you can make some adjustments to enjoy them more guilt-free:
- Air Fryer Onion Rings: Using an air fryer reduces the amount of oil needed for cooking, making the rings significantly less greasy while still maintaining a satisfying crunch.
- Baking: Another healthier option is to bake your onion rings. While you won’t get the same deep-fried crispiness, baking can still deliver a tasty result with much less oil.
- Whole Wheat or Gluten-Free Options: For those with dietary restrictions, try using whole wheat flour or gluten-free breadcrumbs to make a more nutritious, allergy-friendly version.
Opinions From Around the World
After experimenting with onion ring recipes and gathering feedback from a diverse group of people, here are a few thoughts on the beloved snack:
- Emma, 28, UK: “I love onion rings, but I never got the crunch I wanted when I made them at home. After following these tips and using cornstarch in the batter, I finally nailed it. They were crispy and golden. Definitely a game-changer!”
- Carlos, 45, USA: “I’m not a big fan of fried foods, so I tried baking the onion rings instead. They didn’t come out as crispy as the deep-fried version, but they were still delicious and much lighter. I added some garlic powder to the batter for an extra punch of flavor.”
- Sofia, 62, Spain: “I’ve been making onion rings for years, but I learned some great tips here. The oil temperature is key! I also like to add a little bit of paprika to my batter for a Spanish twist. My grandkids love them!”
- Yuki, 34, Japan: “I was hesitant about the batter, but I tried it with some soy sauce and mirin for a unique flavor. It was a fun variation, and my friends were impressed. Definitely worth experimenting with different seasonings.”
Conclusion
Onion rings may seem like a simple dish, but getting them right takes a little attention to detail. From selecting the right onions to perfecting your batter, and monitoring oil temperature, these seemingly small decisions add up to big results. Whether you prefer them battered, breaded, baked, or fried, the key to success is experimenting with the process and having fun along the way.
Remember, onion rings are meant to be enjoyed – so don’t stress over perfection. With a bit of patience and the right tips, you can create a batch of onion rings that will have everyone asking for seconds (or thirds). Happy frying!


