
Drawing a butterfly is an art form that combines creativity, precision, and a touch of patience. Whether you’re a beginner looking to try something new or an experienced artist hoping to improve your skills, understanding the fundamentals of butterfly anatomy and mastering a few essential drawing techniques will help you create stunning, lifelike butterflies.
In this guide, I’ll walk you through the process step-by-step, offering helpful tips, common mistakes to avoid, and suggestions for taking your butterfly sketches to the next level. Let’s start this fluttering journey of artistic discovery!
Understanding Butterfly Anatomy
Before picking up your pencil, it’s helpful to understand the basic structure of a butterfly. While butterflies vary in shape, size, and color across species, their body structure follows a similar pattern:
- Wings: Butterflies are known for their delicate, symmetrical wings that often have vibrant patterns. The wings are made up of two pairs – the forewings (front) and hindwings (back).
- Body: The butterfly’s body consists of three main parts: the head, thorax, and abdomen.
- Head: Houses the antennae, eyes, and mouthparts.
- Thorax: This is the middle section of the butterfly’s body, where the wings and legs are attached.
- Abdomen: The elongated tail part of the butterfly, which is often thinner than the thorax.
Knowing the anatomy is key to drawing the butterfly with proportion and symmetry.
Materials You’ll Need
Before you start, make sure you have the right tools:
- Paper: For beginners, a smooth drawing paper or sketchbook will work well. If you want to add color later, consider using a watercolor pad or thicker drawing paper.
- Pencils: A range of pencils, from H (hard) to B (soft), will allow you to achieve various levels of shading and detail. Start with a light pencil (H or 2H) for sketching and use a softer pencil (4B or 6B) for shading.
- Eraser: A kneaded eraser is great for gentle corrections, while a precision eraser can help with fine details.
- Coloring Materials: Colored pencils, watercolors, or markers can be used for adding vibrant colors to your butterfly.
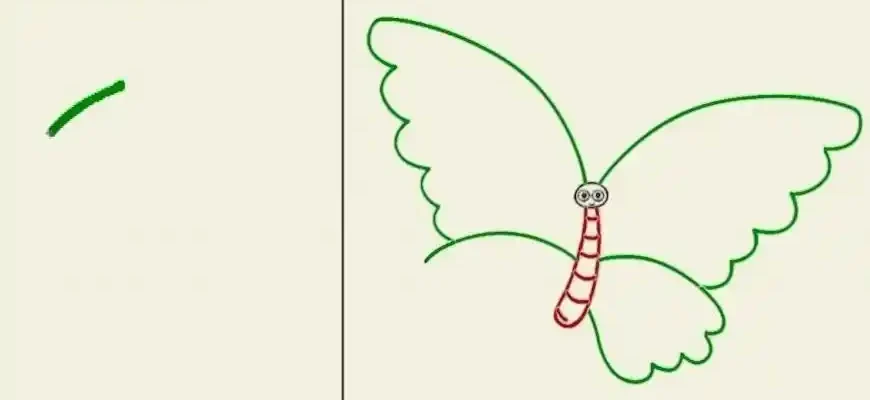
Step 1: Outline the Butterfly’s Basic Shape
Start with the basic outline of the butterfly’s body and wings. This part of the process is about getting the proportions right.
- Draw the Body: Lightly sketch the outline of the butterfly’s body in the center of your page. Make sure to keep the body relatively slim and elongated, with a wider middle section (thorax) and a thinner end (abdomen).
- Sketch the Wings: Draw the outline of the wings starting from the thorax. The forewings will be slightly larger and more rounded, while the hindwings are smaller and more oval-shaped. Ensure that the wings are symmetrical.
Step 2: Add the Details
Now that you have the basic shapes in place, start adding the finer details.
- Define the Body: Refine the outline of the butterfly’s body. The thorax should be noticeably wider and more rounded, while the abdomen should taper down towards the back. Add tiny legs emerging from the thorax.
- Add the Antennae: Draw two long, thin antennae coming out from the top of the head. They should be curved or slightly angled.
- Wing Patterns: Butterflies are famous for their intricate wing patterns. These can range from simple dots to complex shapes and designs. Begin sketching light, simple shapes on the wings. Common patterns include spots, bands, and streaks. You can choose to mimic a specific butterfly species or create your own design.
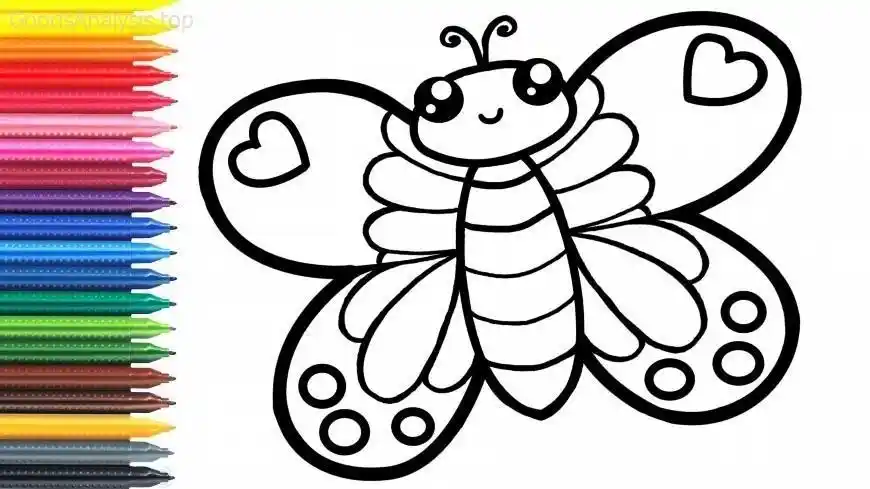
Step 3: Refine the Wings and Add Details
- Wing Veins: Butterflies’ wings are made up of delicate veins. Lightly sketch these veins on both the forewings and hindwings. Focus on getting the symmetry right; the veins on each wing should mirror each other.
- Detailing the Body: Add details to the butterfly’s body, like tiny segments on the abdomen. You can also add small details to the legs if you’d like.
Step 4: Add Shading and Texture
Shading gives your butterfly depth and dimension. The key is to observe where the light hits and where the shadows fall.
- Shading the Body: Use a soft pencil (B or 2B) to gently shade the body, especially around the abdomen and thorax. This will give the butterfly a three-dimensional look.
- Shading the Wings: The wings will have areas of light and shadow. Typically, the top parts of the wings (closer to the body) are darker, while the outer parts are lighter. Use a softer pencil for smooth shading, but leave areas white to represent highlights.
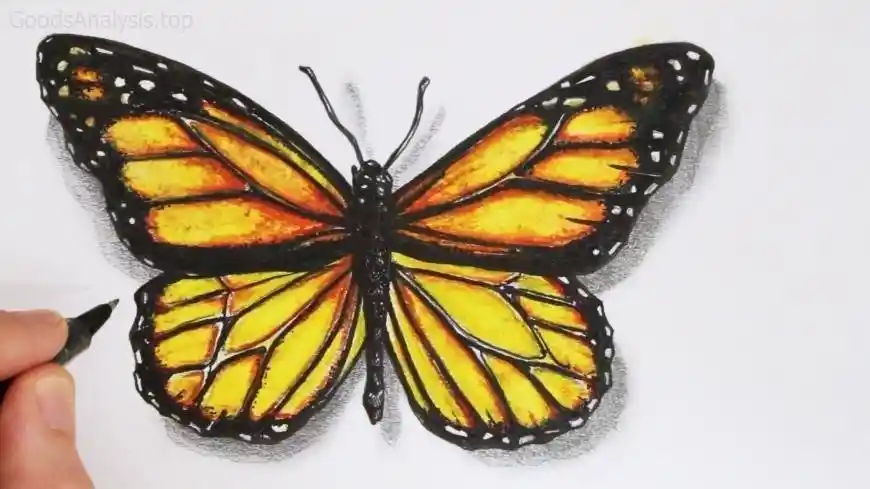
Step 5: Add Color
Now comes the fun part: bringing your butterfly to life with color. Butterflies are known for their vivid hues, so use your chosen coloring medium to add vibrancy.
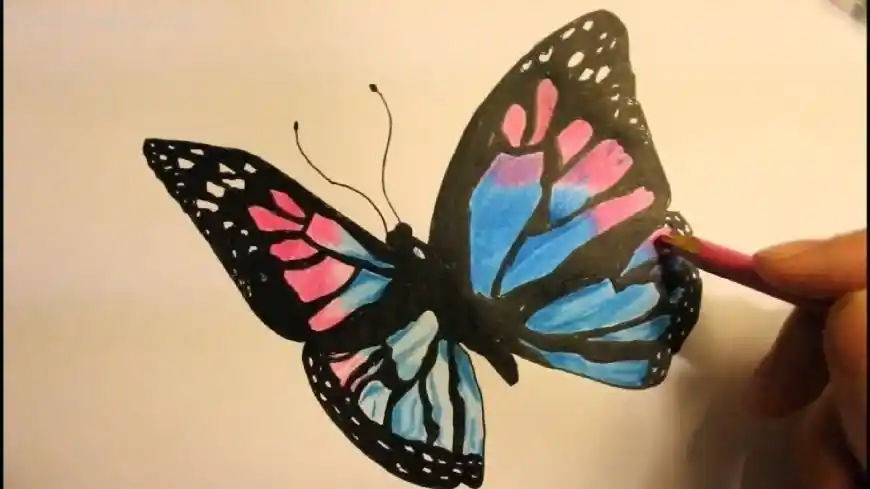
- Coloring the Wings: Start with the lightest color and build up darker shades gradually. Use a variety of colors to mimic the natural beauty of butterfly wings. Pay attention to the natural gradients and color transitions found in real butterflies.
- Blend the Colors: For a more realistic effect, blend your colors smoothly. This is especially important if you’re using colored pencils or markers. You can use a colorless blending pencil or a soft brush for watercolors to create smooth transitions.
Step 6: Final Touches
- Final Shading: Add any final shading to enhance the details on the wings, body, and antennae.
- Highlights: Use a white gel pen or a very light pencil to add highlights where the light naturally hits the butterfly’s wings and body.
Common Mistakes to Avoid
- Imbalance in Proportions: Ensure the wings are symmetrical and that the body is proportional to the wings. If you notice any imbalance, make adjustments early in the drawing.
- Overcomplicating Patterns: While butterfly wings can have intricate patterns, don’t overwhelm yourself with too much detail. Start with simple patterns and gradually add complexity as you become more comfortable.
- Lack of Shading: Shading is essential for giving your butterfly a realistic and three-dimensional look. Don’t skip this step!
How to Improve Your Butterfly Drawing
- Practice Different Species: Try drawing various species of butterflies to get a feel for their unique shapes, wing patterns, and colors.
- Focus on Light and Shadow: Lighting is crucial in any drawing. Experiment with different light sources to see how the shadows fall on the butterfly’s body and wings.
- Use Reference Photos: If you’re struggling with the shape or patterns, use reference photos of real butterflies to guide your work.
Opinions on Drawing Butterflies
To get a broader perspective on the process, here are a few thoughts from different people:
- Emma, 32, USA: “I’ve always struggled with drawing symmetry, but learning how to sketch a butterfly really helped me focus on balance. It’s surprisingly therapeutic!”
- Carlos, 45, Spain: “I didn’t realize how important shading was until I tried drawing butterflies. It makes all the difference in making them look realistic.”
- Anita, 60, India: “I love how drawing butterflies allows for so much creativity. The color choices are endless, and it feels like each butterfly has its own personality.”
- Marcus, 23, UK: “I always thought drawing butterflies was for kids, but after trying it, I’ve gained a lot of respect for the process. It’s a lot more complex than it looks.”
- Yuki, 37, Japan: “I enjoy the meditative process of drawing butterflies. It’s not just about the final product, but about finding joy in the steps along the way.”
Conclusion
Drawing a butterfly is more than just creating a beautiful image; it’s about understanding the structure, embracing your creativity, and honing your technical skills. With a little patience and practice, anyone can learn to draw a butterfly, no matter their age or skill level. And remember: don’t stress over perfection. Each butterfly you draw will be a unique work of art!
Happy drawing, and may your wings always be free to fly (on paper, at least)!


