Making marshmallows at home isn’t just about indulging in a little culinary magic. It’s about crafting something from scratch, controlling the ingredients, and turning a simple treat into a personalized experience. This guide, drawing on years of experience and research, will take you through every step of the process. Whether you’re a seasoned kitchen veteran or someone looking to try your hand at homemade sweets, there’s something here for you.
Why Make Marshmallows at Home?
You may ask, “Why bother when I can just pick them up at the store?” Well, the answer is simple. Homemade marshmallows are so much better. They are fluffier, softer, and completely customizable. They also don’t come packed with the artificial flavors and preservatives you’ll find in most store-bought versions. And, honestly, making them from scratch can be quite fun—plus, it impresses guests! And let’s face it, who doesn’t love a homemade treat that’s as delicious as it is nostalgic?
That said, homemade marshmallows do come with their challenges. You’ll need some special equipment, a little patience, and a bit of science, but nothing too intimidating. Plus, I’ll walk you through it all, including the potential pitfalls and how to avoid them.
What You Need to Know: The Ingredients
Let’s start with the basics: marshmallows are made from just a handful of ingredients. Here’s the rundown:
- Gelatin: The backbone of marshmallow texture, gelatin gives them that light, airy consistency. It’s a simple protein derived from collagen, usually from animal sources. If you’re vegan or vegetarian, there are plant-based alternatives like agar-agar, but it requires slightly different handling (more on that later).
- Sugar: White granulated sugar is your go-to for sweetness, but feel free to experiment with different kinds like brown sugar for a caramel-like flavor or powdered sugar for a smoother finish.
- Corn syrup: This helps prevent crystallization and gives marshmallows their chewy texture. You can substitute honey, but that will give them a distinct flavor, so consider if that’s the taste you want.
- Water: You’ll need water to dissolve the gelatin and create the syrup.
- Vanilla extract: This is where you can add flavor to your marshmallows. Pure vanilla is preferred for its natural flavor, but imitation vanilla will work if you’re in a pinch.
- Salt: A pinch of salt balances the sweetness and enhances the other flavors.
- Powdered sugar and cornstarch: These will coat the marshmallows to prevent them from sticking together. You’ll mix them into a dusting powder that gives your marshmallows that non-sticky finish.
The Equipment You’ll Need
To get the job done properly, here’s what you’ll need:
- Stand mixer or hand mixer: Marshmallow fluff is best whipped in a stand mixer. If you don’t have one, a hand mixer will do, but it will take more time and effort.
- Candy thermometer: To get the perfect sugar syrup temperature (the sweet spot is between 240°F and 245°F or “soft ball stage”), a good candy thermometer is essential.
- 9×13 inch baking pan: This is the standard size for making marshmallows, but you can adjust it depending on how thick or thin you want your marshmallows.
- Sifter: For dusting the finished marshmallows with the powdered sugar and cornstarch mix.
- Spatula: For scraping down the sides of your bowl and ensuring every last bit of goodness gets mixed in.
The Step-by-Step Process
Making marshmallows from scratch is actually pretty straightforward if you break it down into steps. Here’s how to do it:
- Prepare Your Pan: First, line a 9×13 inch pan with parchment paper or lightly grease it. Then, combine powdered sugar and cornstarch in a small bowl and dust the bottom and sides of the pan with the mixture to keep your marshmallows from sticking later.
- Bloom the Gelatin: In the bowl of your stand mixer, sprinkle the gelatin over ½ cup of cold water. Let it sit for about 5 minutes to bloom (this allows the gelatin to absorb the water and become gel-like).
- Make the Syrup: While the gelatin is blooming, combine 1 cup of water, sugar, and corn syrup in a saucepan over medium heat. Stir until the sugar dissolves, then bring the mixture to a boil. Attach your candy thermometer, and let it cook until it reaches 240°F (the soft ball stage). Keep an eye on it—this is the key to getting that perfect texture!
- Combine Syrup and Gelatin: Once the syrup has reached the correct temperature, remove it from the heat. Turn your mixer on low and slowly pour the hot syrup into the bloomed gelatin. Gradually increase the mixer speed to medium-high and beat the mixture for about 10-15 minutes. The mixture should turn thick, glossy, and nearly double in volume.
- Flavor: At this point, add your vanilla extract and a pinch of salt. Beat for an additional 30 seconds to incorporate the flavor.
- Transfer to Pan: Pour the marshmallow mixture into your prepared pan and spread it out evenly. Be careful not to deflate the fluff too much. Use a spatula to smooth the top.
- Let it Set: Let the marshmallows sit at room temperature for 4-6 hours, or preferably overnight. This allows them to firm up.
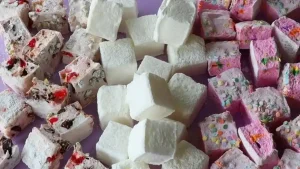
- Cutting the Marshmallows: Once set, dust the top of the marshmallow slab with more powdered sugar and cornstarch. Turn the slab out onto a clean surface and use a sharp knife or kitchen scissors to cut it into squares. Coat each piece with more powdered sugar and cornstarch to prevent them from sticking.
Common Pitfalls and How to Avoid Them
- Gelatin clumping: Make sure your gelatin is blooming properly. If it’s not dissolving well, you might not have used enough water or it may have been sitting too long.
- Syrup too hot or too cool: The temperature is critical. If the syrup gets too hot (over 245°F), your marshmallows will become too firm. Too cool, and they won’t set properly.
- Stickiness: If your marshmallows are too sticky, it’s likely because you didn’t coat them enough with powdered sugar and cornstarch. Don’t skimp on this step—get them well-dusted!
- Vegan Marshmallows: If you’re opting for a plant-based version, replace the gelatin with agar-agar, but note that it behaves differently. You’ll need to boil it with the syrup to activate it, and it might create a firmer marshmallow.
People’s Opinions on Homemade Marshmallows
To get a sense of how others feel about this endeavor, here’s what a few people around the world had to say:
- Laura, 47, United States: “I’ve been making marshmallows at home for years, and they’re always a hit! I add a little almond extract for a twist. I’ll never go back to store-bought.”
- Carlos, 32, Mexico: “The process seemed intimidating at first, but once I got the hang of it, it was easy and fun! I love that I can control the sweetness and the flavors.”
- Aya, 59, Japan: “I appreciate that you can make them with natural ingredients. I tried using agar-agar, and it worked just fine—different texture, but still delightful.”
- Anwar, 26, Pakistan: “Homemade marshmallows were a pleasant surprise. They don’t have that artificial taste, and I can make them exactly how I like.”
- Olivia, 72, United Kingdom: “I used to make marshmallows when I was younger and it’s nice to revisit. I had some trouble with the syrup temperature at first, but now it’s like second nature. There’s nothing like the taste of homemade!”
Final Thoughts
Making marshmallows at home is a rewarding and tasty adventure. While it does require some careful attention to detail, the payoff is undeniable. You’ll enjoy a far superior treat that can be customized to your heart’s desire. Whether you’re a beginner or a seasoned pro, this guide provides everything you need to create fluffy, melt-in-your-mouth marshmallows. Go ahead, give it a try! You’ll be glad you did.

