

Making butter is a timeless skill, one that connects us to our past, reminds us of simpler times, and offers the pleasure of creating something rich and delicious with your own hands. In this comprehensive guide, I’m going to take you through the process of making butter from scratch, share some of the science and history behind it, and even highlight a few points you should consider before you begin. Let’s dive in!
What You Need to Make Butter
First, let’s get the essentials out of the way. Making butter is actually quite simple, but it does require a few basic ingredients and tools. Here’s what you’ll need:
- Heavy Cream (Whipping Cream) – The most critical ingredient. The fresher, the better. Ideally, it should be unpasteurized or minimally processed to get the most flavor.
- Salt (optional) – Depending on your preference, salted or unsalted butter can be made. Salt helps preserve the butter and adds flavor, but it’s entirely up to you.
- Ice Water – For rinsing the butter once it’s churned to help remove excess buttermilk.
- A Mixing Bowl or a Stand Mixer – You can make butter by hand (with a whisk or a jar), but a stand mixer will make the process much easier.
- Butter Muslin or Cheesecloth – For draining any remaining buttermilk from your butter once it’s formed.
- A Spatula or Wooden Spoon – To help work out any leftover buttermilk.
- A Clean, Dry Towel or Paper Towels – For drying your butter once it’s done.
The Process: Step-by-Step
Step 1: Whip the Cream
Start by pouring your heavy cream into the mixing bowl or the bowl of your stand mixer. You’ll want to whip it on medium speed, gradually increasing it. If you’re doing this by hand, it will take more effort, but it’s totally doable in a jar (just make sure to shake it well and with a steady rhythm).
At first, the cream will turn into whipped cream, which is nice for topping desserts, but if you keep going, the whipped cream will start to break down, and the butterfat will begin to separate from the liquid. This is the key moment where butter is born.
Step 2: Separate the Butter from the Buttermilk
As you continue whipping, you will notice that the cream begins to break apart. The liquid that separates from the butterfat is called buttermilk (not to be confused with the tangy buttermilk you buy in stores). It’s a wonderful byproduct and can be used in baking or for making pancakes.
Once you see the butterfat clumps coming together, stop the mixer, and pour off the buttermilk (save it!). At this point, you’ll have soft butter, but you’re not quite done yet.
Step 3: Rinse the Butter
Now that the buttermilk is separated, you need to rinse the butter to remove any remaining liquid. The cleaner the butter, the longer it will last. To do this, pour cold ice water over the butter in the bowl, gently kneading it with your hands or a spatula to wash away any lingering buttermilk. Repeat this a few times until the water runs clear.
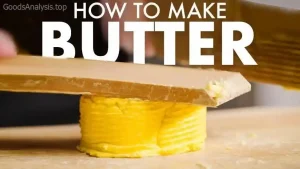
Step 4: Work the Butter
Once the buttermilk is rinsed away, you’ll want to squeeze out any excess water. You can use cheesecloth or muslin for this, or simply work it with your hands. Some people like to add salt at this stage for flavor, but it’s entirely optional.
If you’re looking to create compound butters (think garlic or herb-infused butter), now’s the time to add your favorite flavorings. Just mix them in thoroughly.
Step 5: Store Your Butter
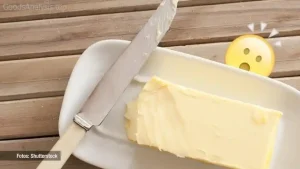
Once you’ve worked out any remaining water, you can shape the butter into a block or a small ball, wrap it in parchment paper, and store it in the fridge. If you’re using salted butter, it will last longer due to the preservative effect of salt. Unsalted butter, on the other hand, should be consumed within a week or two for optimal freshness.
The Science Behind Butter Making
Making butter is a wonderful example of simple chemistry in action. The cream you start with is a mixture of water, milk fat, and proteins. When you agitate the cream (by whipping or churning), you break down the fat globules, causing the fat to clump together. The remaining liquid, the buttermilk, is mostly water and whey proteins.
This separation of fat from liquid is essentially the process of “churning,” and it’s been done for thousands of years. In fact, people have been making butter since the Neolithic period, and it became a common practice in Europe around 2000 BCE. Over time, butter production became increasingly refined, but the basic principles remain unchanged.
The Health Aspect: Butter in Moderation
Now, let’s talk about the elephant in the room: Is butter healthy? That’s a question that has sparked debates for decades, and while it’s true that butter is high in saturated fats, recent research suggests that the story isn’t as simple as we once thought.
Here’s the thing: Eating a moderate amount of butter is unlikely to cause major health issues for most people, especially if you’re also eating a balanced diet. Some studies suggest that butter in moderation may not significantly affect heart disease risk, especially when consumed in place of unhealthy trans fats.
But, of course, if you have specific health concerns (like heart disease or high cholesterol), it’s always a good idea to consult with a healthcare professional before indulging in butter regularly.
Potential Drawbacks of Butter
As with anything, there are a few considerations. Butter is calorie-dense, so consuming it in excess can contribute to weight gain. Additionally, as it’s rich in saturated fats, too much can lead to an increased intake of LDL (bad) cholesterol, which is a risk factor for cardiovascular disease.
One solution is to opt for grass-fed butter. Grass-fed butter contains higher levels of omega-3 fatty acids and vitamin K2, which are associated with better overall health outcomes. So, if you’re going to indulge, you might as well do it in the healthiest way possible!
Conclusion: The Art and Joy of Butter-Making
Making butter is more than just a way to add flavor to your toast—it’s a connection to tradition, a hands-on culinary skill, and a celebration of natural ingredients. Whether you’re making a small batch for yourself or sharing it with loved ones, the process can be incredibly rewarding.
Remember, while butter is a treat best enjoyed in moderation, it’s a world apart from the overly processed spreads that often populate our grocery shelves. Plus, if you want to make a batch of butter that is truly yours—full of character and flavor—there’s no better way than making it from scratch.
And, as promised, here are a few thoughts from people around the world on the matter:
- Anna, 38, Italy: “I love making butter with my grandmother. It’s a tradition passed down through the generations. The key is to use fresh, local cream—it makes all the difference in taste!”
- Raj, 55, India: “Butter has always been a part of my diet, especially in cooking. I make my own butter at home, and I find that it tastes so much better than store-bought.”
- Maria, 28, Mexico: “I use butter in everything! But I’m careful with how much I eat. A little goes a long way, and homemade butter just tastes more real.”
- Liam, 45, USA: “I was always intimidated by butter-making, but once I gave it a try, it wasn’t nearly as difficult as I thought. Plus, the butter lasts longer than the stuff I buy at the store.”
- Yuki, 63, Japan: “Making butter was never something I grew up with, but I tried it a few years ago. It’s fascinating to see how something so simple can taste so good when it’s fresh.”
So there you have it! Whether you’re an experienced cook or a beginner, making butter can be a fun and rewarding experience. Enjoy the process, and remember—there’s no rush! The best butter is the one made with care and a little bit of love.


