
Making your own soap can be a rewarding, creative, and practical experience. Whether you’re interested in crafting soap for personal use, as a hobby, or even as a potential business venture, the process offers not only the satisfaction of creating something with your own hands but also the ability to tailor your soaps to your specific needs and preferences.
Soap-making has been around for thousands of years, evolving from ancient civilizations’ humble attempts to cleanse to today’s advanced, scientifically backed formulations. Now, soap-making can be done easily at home with a few basic supplies. But before diving into the details, let’s break down the fundamentals, potential challenges, and why you might want to consider making soap yourself.
The Basics of Soap-Making
At its core, soap is the result of a chemical reaction called saponification, where fats (like oils or animal fats) react with an alkaline substance, usually sodium hydroxide (lye), to create soap and glycerin. This reaction happens when you mix the two ingredients, and it’s essentially the process behind all soap-making, whether you’re making it at home or commercially.
The Ingredients You Need
To make soap, you’ll need a few essential ingredients:
- Oils or Fats: The most common oils used in soap-making are coconut oil, olive oil, palm oil, and castor oil. Each oil brings its own characteristics to the soap. For example:
- Coconut oil is excellent for creating bubbly lather.
- Olive oil creates a gentle, moisturizing soap.
- Palm oil adds hardness and stability.
- Castor oil enhances the lathering properties. You can also experiment with other oils, like shea butter, cocoa butter, or even avocado oil, depending on the properties you desire.
- Lye (Sodium Hydroxide): Lye is the base that, when combined with oils, initiates the saponification process. Sodium hydroxide is the lye most commonly used for solid soap bars. It’s crucial to handle lye with care, as it is a caustic substance and can cause severe burns if not used properly. Always wear gloves and goggles when working with it.
- Water: Distilled water is generally used to dilute the lye before adding it to the oils.
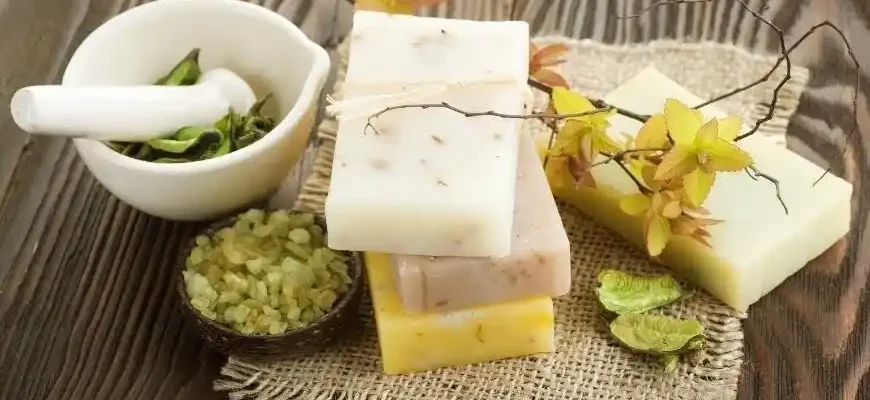
- Additives and Fragrance: Once you’ve got the basic soap down, you can add different elements to enhance your product:
- Essential oils for fragrance.
- Natural colorants like turmeric, clay, or activated charcoal.
- Herbs, oats, and exfoliants for texture or skin benefits.
- Molds: These come in all shapes and sizes. Silicone molds are popular because they make it easier to remove the soap once it has hardened.
The Process: How to Make Soap
The soap-making process consists of four main steps: mixing, pouring, curing, and cutting. Below is a step-by-step breakdown.
Step 1: Preparing the Lye Solution
Important note: Always add lye to water, not the other way around. Lye can heat up quickly when mixed with water and may cause splashing if not done properly.
- Measure out the amount of distilled water required by your recipe.
- Slowly add the lye to the water, stirring gently until the lye dissolves. The solution will get hot, so let it cool down to around 100°F (38°C) before moving to the next step.
Step 2: Melting the Oils
While the lye solution cools, melt the solid oils (like coconut oil or palm oil) over low heat. Once melted, add the liquid oils (like olive or castor oil) to the mixture. Allow the oils to cool to about the same temperature as the lye solution (around 100°F).
Step 3: Mixing the Lye Solution with Oils
Once both the lye solution and oils are at the right temperature, slowly pour the lye solution into the oils. Using an immersion blender or hand whisk, blend the mixture until it reaches “trace”—a consistency similar to thin pudding. This is when the soap has thickened and is ready for additives.
Step 4: Adding Fragrance, Colorants, and Additives
Now is the time to add any extras to your soap, like fragrance oils, colorants, or exfoliants. Stir them in gently to distribute evenly throughout the soap mixture.
Step 5: Pouring into Molds
Once everything is well-mixed, pour the soap mixture into your molds. Tap the mold gently on the counter to remove air bubbles.
Step 6: Curing and Cutting the Soap
After pouring, allow the soap to harden for 24-48 hours at room temperature. When it has set and hardened, remove the soap from the mold and cut it into bars. Soap needs to cure for about 4-6 weeks to fully dry out and harden, which allows the soap to reach its best lathering and mildness.
Common Soap-Making Challenges and How to Solve Them
While soap-making can be fun and satisfying, it does come with a few challenges. Let’s take a look at some common issues and how to solve them:
- Soap is Too Soft: This is often due to too much water or not enough hard oils. Solution: Use less water and make sure you have the right balance of oils in your recipe. You can also add more solid oils like coconut oil.
- Soap Turns Out Too Harsh or Burns Skin: If you accidentally used too much lye, your soap may be too alkaline. Solution: Always use a lye calculator to ensure the correct ratios of lye and oils.
- Soap Doesn’t Set Properly: If your soap doesn’t harden, it might have been poured into the mold too soon, or the oils weren’t properly balanced. Solution: Make sure the soap is mixed to the proper trace and give it time to harden in the mold.
- Uneven Color or Texture: This can happen if the additives weren’t properly mixed or the fragrance oil caused the mixture to seize. Solution: Always mix in colorants and fragrances thoroughly and at the right time in the process.
Who Should Make Soap?
Soap-making isn’t just for hobbyists—it can be a practical skill for anyone interested in natural, eco-friendly living. If you have sensitive skin, making your own soap ensures that you know exactly what goes into the product you’re using. Homemade soap can also be a thoughtful, personalized gift.
However, soap-making does require a bit of patience and practice. It’s not necessarily a quick project if you want high-quality soap, and you must be cautious when handling lye, as it can cause burns or injuries if mishandled.
Real-Life Soap-Making Experiences
To offer a broader perspective, here’s what a few people from around the world think about making their own soap:
- Maria (47, Spain): “I started making soap as a way to control what goes into my products, especially with my sensitive skin. I can’t go back to store-bought soap anymore—homemade is just so much gentler.”
- David (34, USA): “At first, I thought it was too complicated, but after watching a few videos, I tried it, and it’s actually really fun. I like experimenting with scents and colors. My friends think I’m a bit of a soap snob now!”
- Zara (56, India): “I’ve been making soap for years. It’s part of my family tradition. I use mostly coconut oil, and it works wonders for the skin. It’s great to know I’m using something completely natural.”
- James (26, UK): “Honestly, I started making soap to save money. I didn’t realize how much more enjoyable it would be. Plus, I feel good about using something chemical-free.”
- Amina (39, Nigeria): “Soap-making is an art for me. I’ve made a small business out of it, and I sell to local stores. People are always impressed by the fact that I make it all myself, and the demand is growing.”
Final Thoughts: Is Soap-Making Worth It?
If you’re up for it, soap-making can be an incredibly satisfying craft to get into. While it has its challenges (like any hobby or skill), it’s a manageable learning curve for anyone who’s patient and willing to follow the guidelines. Plus, the joy of using a product you’ve created yourself—tailored to your specific preferences—is unmatched.
So, get your lye, oils, and molds, and start experimenting. You may just find a new favorite hobby—or even a profitable side business—right in your own kitchen.
FAQ
Q1: Is soap-making difficult for beginners?
A1: Not at all! With the right resources and basic safety precautions, anyone can start making soap at home. It’s a learning process, but very rewarding once you get the hang of it.
Q2: How can I make my soap more moisturizing?
A2: Add oils like olive oil, avocado oil, or shea butter to your recipe. These oils are known for their moisturizing properties and will make your soap gentler on the skin.
Q3: Can I sell homemade soap?
A3: Absolutely! If you follow the correct procedures and meet any local regulations (especially regarding ingredient safety), you can sell your soap at farmers’ markets or online.


