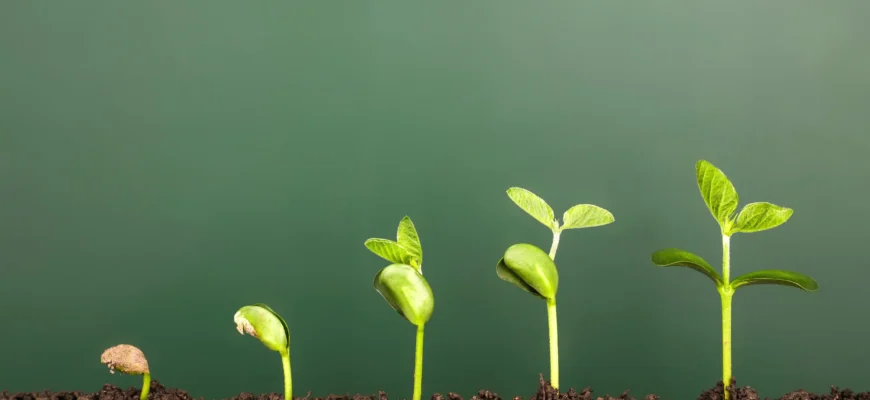
Growing plants from seeds is one of the most rewarding and, yes, occasionally frustrating activities you can do as a gardener. It’s not just about watching life unfold in a pot or garden bed – it’s about understanding how nature works, connecting with the Earth, and learning to be patient. Whether you’re an old hand at this, or a newcomer to the joy (and occasional heartbreak) of growing plants from scratch, this guide is for you.
Step-by-Step Process: Starting with Seeds
1. Choose the Right Seeds
The first step, and one you shouldn’t rush through, is selecting the right seeds. The seed packet often has helpful information, like climate suitability, planting depth, and time to harvest. You wouldn’t want to plant a tropical fruit tree in your cold, temperate zone garden, right? Choose seeds that are suitable for your area. You can always check the USDA Plant Hardiness Zone Map or your local agricultural extension office for guidance.
- Tip: Don’t just pick seeds based on how pretty the flowers are or how tempting the fruit looks. Consider your environment and available space. Some plants require a lot of attention, while others are happy to be left to their own devices.
2. Prepare Your Soil and Containers
You can grow plants in virtually anything. Sure, traditional garden soil is fine, but you can also use containers, raised beds, or even biodegradable pots. The key is to ensure the medium you’re using is well-draining but also rich enough to provide nutrients. A good mix is often half compost, half topsoil. There are plenty of pre-made potting soils available too, designed for specific types of plants (succulents, vegetables, etc.).
For container gardening, make sure you have drainage holes. If you’re using recycled containers (like yogurt cups), poke a few holes in the bottom to prevent waterlogging.
- Tip: Always check that the containers are deep enough for the seed’s root system. Some plants, like tomatoes, need at least 6 inches of soil to grow strong roots.
3. Planting the Seeds
Different seeds have different requirements, so be sure to read the seed packet instructions carefully. The general rule is to plant seeds about twice as deep as their size. For example, small seeds like lettuce should be lightly pressed into the surface, while larger seeds like beans should be buried a bit deeper.
- Tip: If you’re unsure about the planting depth, err on the side of shallow. Many seeds can handle being buried too deep better than being planted too shallow. Shallow planting often leads to poor germination rates.
4. Watering
Seeds need moisture to sprout, but they don’t want to drown. Water gently, ideally with a spray bottle or a watering can with a fine nozzle, to keep the soil moist but not soaking. The trick is to maintain a delicate balance — if the soil is too dry, the seeds won’t germinate, and if it’s too wet, they could rot.
- Tip: To prevent waterlogging, use a drip tray under your containers. This will allow the plants to “drink” water at their roots instead of having stagnant moisture at the bottom.
5. Provide the Right Conditions
Many seeds need warmth to germinate. A cozy temperature between 65-75°F (18-24°C) is ideal for most seeds, but some may require cooler or warmer conditions.
If you’re growing indoors, a windowsill or a grow light can provide the warmth and light they need. If you’re growing outdoors, be mindful of the season. Starting seeds too early in cold climates can stunt their growth or kill them off. For example, many vegetable seeds should be started indoors 6-8 weeks before the last frost date.
- Tip: Use a seedling heat mat if you’re starting plants indoors. These mats provide bottom heat, which encourages faster germination. Just be sure to turn them off once your seeds have sprouted.
6. Transplanting and Care
Once your seeds have sprouted and your seedlings have several true leaves, it’s time to transplant them into bigger pots or directly into your garden. This is often referred to as “hardening off.” To do this, gradually introduce them to outdoor conditions by placing them outside for a few hours each day over a week. This helps them acclimatize to wind, temperature fluctuations, and sunlight.
- Tip: Be gentle when transplanting. Use a small trowel or spoon to carefully lift the seedlings from their pots. Gently separate tangled roots and place them into new containers or holes in the soil.
7. Ongoing Maintenance
Your plants need sunlight, water, and nutrients to grow. Keep an eye on them, and provide support as necessary. Tall plants may need staking, while some plants might require thinning if too many seedlings sprout in one spot.
- Tip: If you’re growing vegetables, consider using organic fertilizers or compost. Chemical fertilizers can sometimes do more harm than good, particularly to soil health over time.
Common Problems When Growing from Seeds
- Poor Germination Rates
This is one of the most common frustrations, and it often happens because seeds are planted at the wrong depth, watered incorrectly, or the temperature isn’t right. Check your seed packets for temperature requirements. - Leggy Seedlings
If your seedlings are tall but weak, it could be a sign they’re not getting enough light. Move them to a sunnier spot or invest in some grow lights. - Diseases or Pests
Diseases like damping-off (a fungal condition) and pests like aphids can devastate seedlings. Make sure your growing space is clean, and you can consider using organic pesticides if necessary.
- Tip: To avoid damping-off, make sure your soil isn’t too moist, and avoid overcrowding your seedlings.
- Transplant Shock
This can happen when seedlings are moved from one environment to another. To reduce transplant shock, water your plants thoroughly before moving them and try to transplant on a cloudy day or in the evening to reduce heat stress.
What Happens After They’re Grown?
If all goes well, you’ll have healthy plants in a few weeks to months, depending on the species. Some may flower, others may bear fruit, and some may simply add lovely greenery to your space. Either way, growing plants from seed teaches patience and a deeper understanding of nature. And it’s an activity that, no matter the outcome, can bring joy and fulfillment.
Real Opinions on Growing from Seeds
Here are a few perspectives from around the world:
- Rosa, 52, Spain: “I’ve been growing vegetables from seed for years now. It’s my meditation. Yes, I’ve had my share of failures — squash that didn’t grow, beans that were eaten by slugs. But there’s nothing more satisfying than eating a tomato that you grew from seed. It feels like you’ve earned it.”
- Chandra, 34, India: “I was always intimidated by the idea of growing plants from seeds. But after a gardening workshop, I started small with herbs. To my surprise, they thrived! I think the key is not to expect perfection and to learn as you go.”
- Sam, 46, USA: “I love growing from seed because it’s more affordable, but it does take time and patience. I recommend starting with easy-to-grow plants like marigolds or sunflowers before you get into the more tricky ones.”
- Lucia, 25, Brazil: “I’m new to gardening, but I’ve had some success with growing flowers from seeds. The biggest challenge is definitely the germination process. Sometimes they just don’t sprout, and it’s hard not to take it personally!”
- James, 59, UK: “I’ve been growing my own vegetables for decades. The key is consistency and observation. And don’t be afraid to ask for advice from local gardening groups. Everyone has a different tip to offer!”
Conclusion
Growing plants from seeds is a satisfying, educational, and often therapeutic experience. While it’s not without challenges — from pests to unpredictable weather — the rewards are definitely worth the effort. With patience, persistence, and a little bit of humor, anyone can start their gardening journey from the ground up. So, roll up your sleeves, get your hands dirty, and remember: even the most experienced gardeners have their failures — it’s part of the fun!

