Pickles—those crunchy, tangy delights that make any meal a little more interesting. Whether you’re a fan of the classic cucumber pickle or enjoy experimenting with different vegetables, making pickles at home is a tradition that goes back centuries and is still cherished today. As someone who’s spent a good chunk of time perfecting my pickle-making skills and learning from others along the way, I’m happy to share the wisdom I’ve picked up, including both the joys and occasional hiccups.
Why Make Pickles at Home?
Making pickles at home is not just about having something tasty to snack on—it’s about control, creativity, and, frankly, a little bit of culinary therapy. When you make pickles yourself, you can choose the ingredients, the flavor profile, and the level of tanginess. Plus, you know exactly what’s going into the jar—no mystery preservatives or artificial colors here.
And let’s be real, there’s a certain sense of satisfaction that comes from making something that’s usually store-bought, and then sitting down to enjoy the fruits (or vegetables) of your labor.
The Basics of Pickling
At its core, pickling is a preservation method that uses acid (usually vinegar) or fermentation (through saltwater brine) to create an environment where bacteria can’t thrive, thus keeping food safe and extending its shelf life.
There are two main types of pickles:
- Vinegar pickles – These are the more common variety. You prepare a vinegar solution, pour it over your vegetables, and seal the jar. The acidity from the vinegar preserves the food, preventing spoilage.
- Fermented pickles – Instead of vinegar, these rely on natural fermentation. You submerge your vegetables in a saltwater brine, and the bacteria (the good kind, mind you!) slowly turn the sugars in the vegetables into lactic acid. This process takes longer, but the results are amazing—fermented pickles are often more complex in flavor.
Essential Ingredients for Pickling
To get started, you’ll need a few basic ingredients, most of which you probably already have in your kitchen.
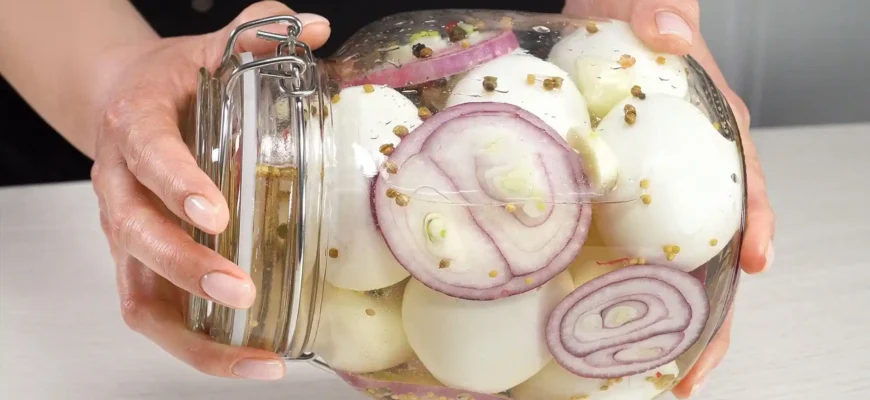
- Vegetables: Cucumbers are the classic choice, but nearly any vegetable can be pickled. Try carrots, beans, cauliflower, or even onions.
- Vinegar: Distilled white vinegar is the most common, but you can also experiment with apple cider vinegar or red wine vinegar for different flavors.
- Salt: Sea salt or kosher salt is the best. Regular table salt contains iodine, which can affect the taste and color of your pickles.
- Sugar: A little sugar helps balance out the acidity of the vinegar. Some people like their pickles sweet, while others prefer them sour—feel free to adjust the sugar to your taste.
- Spices: This is where things get fun! Garlic, dill, mustard seeds, peppercorns, and even chili flakes can be added. The combination is up to you, so get creative!
Step-by-Step Process for Vinegar Pickles
Let’s break down the process for making vinegar-based pickles—simple, quick, and reliable.
Ingredients:
- 4 cups of water
- 1 cup of vinegar (white or apple cider vinegar)
- 2 tablespoons of salt
- 2 tablespoons of sugar
- 3 cloves of garlic (optional)
- Fresh dill (optional)
- 1 tablespoon of mustard seeds, peppercorns, or any other spices you like
- 3-4 cucumbers (or another vegetable)
Instructions:
- Prepare the Vegetables:
Wash your vegetables thoroughly. For cucumbers, slice them into rounds or spears, depending on your preference. You can also leave them whole, but cutting them ensures the brine will penetrate more evenly. - Make the Brine:
In a saucepan, combine water, vinegar, salt, and sugar. Bring it to a boil, stirring until the salt and sugar dissolve. Let the brine cool for a few minutes. - Pack the Jars:
In sterilized mason jars, pack the sliced vegetables tightly. Add the garlic, dill, mustard seeds, or any spices you like to the jar for flavor. - Pour the Brine:
Pour the hot brine into the jars over the vegetables. Make sure the vegetables are fully submerged in the liquid. You can use a small weight or a piece of plastic wrap to hold them down. - Seal and Store:
Seal the jars with lids and let them cool to room temperature. Once cool, refrigerate them for at least 24 hours. The pickles will improve over the next few days as the flavors meld.
Fermented Pickles: A Different Approach
If you’re after that traditional, tangy flavor that comes from fermentation, here’s a simple guide to making your own fermented pickles.
Ingredients:
- 6-8 small cucumbers (or another vegetable)
- 4 cups of water
- 2 tablespoons of sea salt (non-iodized)
- 2 cloves of garlic (optional)
- 1 tablespoon of mustard seeds or peppercorns (optional)
Instructions:
- Prepare the Vegetables:
Wash your vegetables and trim the ends of cucumbers to help them pickle more evenly. - Make the Brine:
Dissolve the salt into water to create a saltwater brine. It’s important to use the right amount of salt—too much, and it’ll be too salty; too little, and the fermentation may not work. - Pack the Jar:
Place the cucumbers (or other vegetables) in a clean jar, packing them tightly. Add garlic and spices as desired. - Add the Brine:
Pour the brine over the vegetables, making sure they’re completely submerged. You can use a fermentation weight or improvise with a clean rock or a small bowl. - Ferment:
Leave the jar at room temperature for 3-7 days, checking it daily. Taste it as it ferments to determine when it’s to your liking. Once it’s fermented to your taste, move the jar to the fridge to slow down the fermentation process.
Common Problems and How to Avoid Them
While making pickles is fairly straightforward, there are a few pitfalls that can occur. Let’s go over a few of the most common problems and how to avoid them:
- Soft Pickles:
If your pickles are soft and mushy, it’s often due to using the wrong type of cucumbers. For the crispiest pickles, use small, firm cucumbers specifically labeled as “pickling cucumbers.” Avoid using waxed cucumbers, as they can affect texture. - Too Salty or Too Sour:
If your pickles turn out too salty, the brine may have too much salt. Adjust the salt-to-water ratio next time. If they’re too sour, reduce the vinegar or sugar, or give them a longer time to ferment. - Cloudy Brine:
Cloudy brine in fermented pickles is often due to the growth of wild yeasts. While it’s usually harmless, it can be prevented by ensuring the vegetables stay submerged under the brine. You can also strain the brine before sealing the jar.
Opinions from Around the World
Here’s what people from different walks of life think about making pickles at home:
- Sofia (45, Spain): “I grew up with my grandmother’s pickles. She always made them with olive oil and garlic—absolutely delicious. I find store-bought pickles to be too salty for my taste. Making them at home has become a fun little ritual.”
- John (61, USA): “I’ve been pickling for years, mostly cucumbers. But I also love making pickled onions and radishes. The biggest tip I can offer is to let the pickles sit for a while—give them time to develop those deeper flavors!”
- Anika (34, India): “I make pickles every summer—mostly mangoes and lemon. But vinegar-based pickles aren’t as common here. Fermented pickles, though, are quite popular. My family loves them. The real trick is balancing the spices just right.”
- Tarek (29, Egypt): “I’ve always been fascinated by the process of fermentation. The idea of using salt and time to create something so delicious really excites me. My favorite pickles are from my mom’s kitchen—she uses a mix of spices, and they always turn out perfect!”
- Maria (53, Brazil): “Pickling isn’t as popular here in Brazil, but I’ve recently started making my own. It’s great for preserving vegetables, and I can adjust the flavor as I like. Sometimes I even make pickled fruits, like guava!”
Final Thoughts
Pickling is an art, and like any art form, it takes practice. Don’t be afraid to experiment and make adjustments along the way. The rewards—whether it’s a perfect jar of tangy pickles or simply the satisfaction of making something from scratch—are well worth it. So roll up your sleeves, grab your vegetables, and start pickling today. Your taste buds will thank you!

