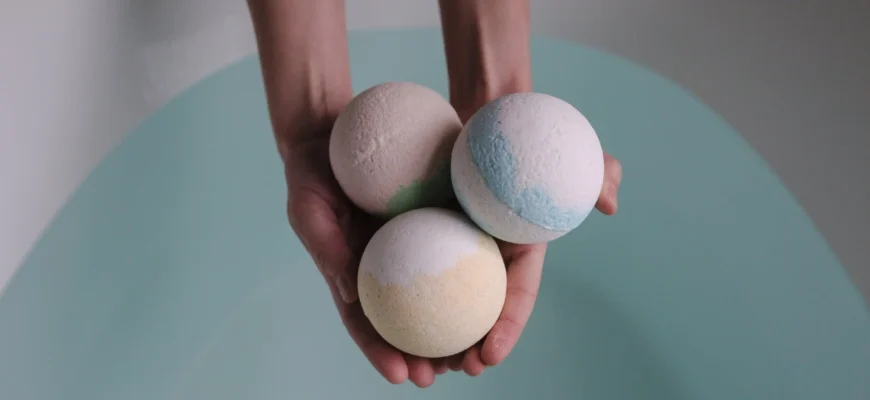
Bath bombs have become a staple in self-care routines, adding a little extra joy to your bath time. But have you ever wondered how these fizzy little wonders are made? Whether you’re a DIY enthusiast or simply looking for a fun project, making bath bombs at home is easier than you might think. Let’s dive into the basics and explore the process, while considering both the fun and the functional aspects of making your own bath bombs.
What You Need to Know About Bath Bombs
Bath bombs are a mixture of ingredients that, when added to water, dissolve and create a fizzy reaction. They are often scented and can include essential oils, colors, and even moisturizing ingredients like shea butter or coconut oil. The primary components of a bath bomb are:
- Baking Soda (Sodium Bicarbonate): This is the main ingredient responsible for the fizzing effect.
- Citric Acid: When combined with baking soda and added to water, citric acid creates a chemical reaction that causes the bath bomb to fizz and dissolve.
- Cornstarch: This ingredient is used to help bind the mixture together and slow down the fizzing process, giving your bath bomb more time to dissolve.
- Epsom Salt or Sea Salt: These are often included for their therapeutic properties, like muscle relaxation and skin soothing.
- Essential Oils: These provide fragrance and can have aromatherapeutic effects. Lavender is popular for relaxation, while citrus scents like lemon and orange are energizing.
- Coconut Oil, Shea Butter, or Almond Oil: These moisturize your skin as the bath bomb dissolves in the water.
- Water or Witch Hazel: This is used to bind the dry ingredients together.
- Food Coloring (optional): To add a splash of color to your bath bomb.
Step-by-Step Guide to Making Bath Bombs
Step 1: Gather Your Ingredients and Tools
Here’s what you’ll need:
- 1 cup of baking soda
- 1/2 cup of citric acid
- 1/2 cup of Epsom salts
- 1/2 cup of cornstarch
- 2 1/2 tablespoons of coconut oil (melted) or shea butter
- 1 tablespoon of water or witch hazel
- 20-30 drops of essential oils (lavender, rose, peppermint, etc.)
- A few drops of food coloring (optional)
- Bath bomb molds (silicone or metal)
- A large bowl and a whisk
- A spray bottle with water or witch hazel
Step 2: Mix the Dry Ingredients
In a large bowl, combine the baking soda, citric acid, Epsom salts, and cornstarch. Use a whisk to ensure there are no clumps.
Step 3: Mix the Wet Ingredients
In a separate bowl, combine the melted coconut oil (or shea butter), water or witch hazel, essential oils, and food coloring. Stir until everything is well incorporated.
Step 4: Combine the Wet and Dry Ingredients
Slowly add the wet ingredients to the dry ingredients, a little at a time, while whisking constantly. Be careful not to add too much liquid at once, as it can trigger a premature fizzing reaction. The mixture should resemble wet sand and hold together when squeezed in your hand.
Step 5: Mold the Bath Bombs
Pack the mixture tightly into your bath bomb molds. If you’re using a two-piece mold, press both halves together firmly and let the excess mixture spill over the sides. For single-piece molds, just fill it to the top. Let the bath bombs sit in the molds for at least 4-6 hours (overnight is even better) to harden.
Step 6: Unmold and Store
Once the bath bombs are dry and hard, gently remove them from the molds. Store them in an airtight container to keep them fresh. It’s best to use them within a few weeks, as moisture and humidity can cause them to lose their fizzing power.
The Benefits of Homemade Bath Bombs
Making bath bombs at home isn’t just about the fun of crafting them; there are several benefits to creating your own.
Customization
One of the major advantages of making your own bath bombs is that you can customize the ingredients. Want to skip synthetic fragrances? Choose natural essential oils instead. Sensitive skin? Use gentler oils and skip the dyes. You can make a bath bomb that’s perfect for your skin and your senses.
Control Over Ingredients
Commercial bath bombs often contain artificial colors, synthetic fragrances, and preservatives that can irritate sensitive skin. By making your own, you can ensure that only natural, skin-friendly ingredients are used. If you have allergies, sensitivities, or specific preferences, DIY bath bombs are a great option.
Therapeutic Benefits
Certain essential oils, like lavender, chamomile, and eucalyptus, are known for their calming, soothing, or revitalizing properties. When you make your own bath bombs, you can choose the oils that best match your needs. Add a bit of dried flowers or herbs to enhance your bathing experience.
Potential Pitfalls and How to Avoid Them
While making bath bombs can be fun, there are a few common mistakes people often make that can affect the outcome. Let’s look at them and how to avoid them.
Too Much Liquid
Adding too much liquid can cause the bath bomb to start fizzing before it’s ready, ruining the bath bomb’s structure and effectiveness. Always add the liquid a little at a time, and don’t be tempted to speed up the process.
Tip: If your mixture starts fizzing before you’re ready, let it dry out for a few hours, and try again.
Improper Drying Time
If the bath bombs aren’t given enough time to harden in the mold, they can break apart easily. Patience is key! Leave them for at least 4-6 hours, or overnight if possible.
Using the Wrong Mold
Some molds don’t hold the mixture well, and others can be difficult to release once the bath bomb has hardened. Silicone molds are generally the easiest to work with, but metal molds also work well if you press the mixture firmly.
Tip: If you don’t have a bath bomb mold, you can use cupcake liners or ice cube trays for smaller-sized bath bombs.
Messy Results
While food coloring can make your bath bombs beautiful, it can also stain hands, counters, and even your bathtub if you’re not careful. Wear gloves when handling food coloring and cover your work area with newspaper or old towels.
Tip: If the food coloring does stain your tub, a good scrub with baking soda and water should do the trick.
Opinions From Bath Bomb Makers Around the World
To provide a broad perspective, here’s what a few people from different walks of life have said about their experiences with making bath bombs.
- Samantha, 34, USA: “I love making bath bombs as a way to unwind. It’s like creating little personal spa moments. I use lavender and rose oils, and it really helps me relax after a long day at work. My skin has never felt softer!”
- Jean-Pierre, 52, France: “Making bath bombs is an excellent hobby. I found that it’s therapeutic in itself — the process of measuring, mixing, and watching them come together. I do advise beginners to be careful with the food coloring, though. I ended up with pink hands for days.”
- Ayesha, 27, India: “My skin is very sensitive, so I make my own bath bombs with only organic ingredients. I stay away from fragrances that might irritate my skin, and I’ve found that shea butter and almond oil work best for moisturizing.”
- Carlos, 60, Spain: “I started making bath bombs as a gift for my daughters, and now I’m hooked. I’ve found that Epsom salts really help my muscles after long walks, and I enjoy experimenting with different scents.”
- Mia, 45, Australia: “I’ve been making bath bombs for years, and I’m always looking for ways to improve the formula. Adding dried flowers and herbs gives them a beautiful touch, but sometimes they clog the drain, so I recommend using muslin bags if you’re adding anything extra.”
Conclusion
Making bath bombs is a fun and rewarding DIY project that allows you to customize your bath experience while avoiding unnecessary chemicals. Whether you’re looking to relax, rejuvenate, or just add a little luxury to your bath, homemade bath bombs are an easy and affordable option. Remember to take your time, avoid adding too much liquid, and let your creations harden properly. The best part? You can always tweak the recipe to suit your personal preferences.
So, go ahead — dive into the world of bath bombs, and turn your bath into a spa-like experience. After all, who wouldn’t want to enjoy a fizzy, fragrant, skin-softening soak?


