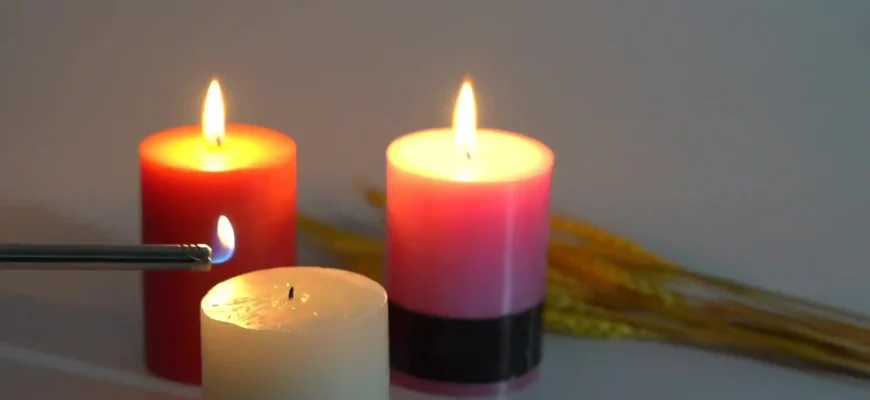
Making candles is an art that blends creativity with practical knowledge. Whether you’re new to candle-making or an experienced hobbyist, there’s always something new to learn. In this detailed guide, I’ll walk you through the process of candle-making from start to finish, covering the basics, the materials, some common pitfalls, and even offering solutions. Along the way, I’ll share insights that come from years of experience—and yes, I’ll throw in a bit of humor for good measure! So, let’s dive in!
The Basics of Candle-Making
Candle-making is the process of combining wax, a wick, and fragrance or color to create a candle. Though it seems simple, the process involves several steps, and each step can be adjusted to produce different effects. Here’s an overview of what you need to get started.
Materials You’ll Need
- Wax: The core ingredient. There are several types to choose from, each with its unique characteristics:
- Paraffin Wax: The most common and inexpensive, paraffin burns cleanly and holds color and scent well.
- Soy Wax: A natural alternative to paraffin, soy wax burns slower and cleaner but often holds less scent.
- Beeswax: Natural and rich, beeswax candles are often more expensive and burn slowly with a natural, honey-like scent.
- Palm Wax: Another natural option, often used for creating textured candles.
- Gel Wax: Used for creating see-through candles, gel wax offers a unique look and can hold objects or decorations inside.
- Wicks: A wick is essential for the candle’s burning. The size of the wick depends on the size of your candle and the type of wax used. Popular wick materials include cotton, wood, and hemp.
- Fragrance Oils (Optional): If you want your candles to smell amazing, fragrance oils are a must. Some waxes, like soy, may not hold fragrance as well as others, so it’s important to choose oils designed for candle-making.
- Dye (Optional): To add color to your candles, use candle dyes. These come in various forms, including liquid, powder, or block. Always use dyes specifically made for candle-making to ensure proper integration with the wax.
- Containers or Molds: You can pour your wax into molds or containers. For beginners, using pre-made containers (like mason jars) is a simple way to get started. For more experienced candle-makers, specialized molds are available in various shapes and sizes.
- Double Boiler or Melting Pot: To safely melt your wax, use a double boiler or a dedicated melting pot. This method ensures the wax doesn’t overheat and catch fire.
- Thermometer: It’s essential to monitor the temperature of the wax. Each type of wax has an ideal pouring temperature to ensure the best results.
Step-by-Step Guide to Candle Making
Step 1: Prepare Your Work Area
Before you even think about melting wax, set up your work area. Lay down newspaper or paper towels to catch any wax spills. You’ll also want to have all your tools and materials easily accessible. Make sure the area is well-ventilated, especially if you’re using fragrances or dyes.
Step 2: Melt the Wax
Using a double boiler or a dedicated melting pot, heat your wax. The general guideline is to heat the wax to around 170-180°F (77-82°C), but this depends on the type of wax you’re using. Stir occasionally and ensure the wax is melted evenly. Avoid overheating, as this can affect the texture and performance of the candle.
Step 3: Add Fragrance and Color (Optional)
Once the wax is melted, this is the time to add fragrance oils and dye. For fragrance, aim for about 6-10% of the total weight of the wax. If you’re adding color, a few drops of liquid dye or a small piece of dye block will suffice. Stir the mixture well to ensure the fragrance and color are evenly distributed.
Step 4: Prepare the Wick
While the wax is cooling slightly, prepare your wick. Cut the wick to a length slightly longer than the height of your container or mold. Attach the wick to the bottom of the container using a wick sticker, glue gun, or simply by dipping it in melted wax and sticking it down.
Step 5: Pour the Wax
Once the wax has cooled to about 130-140°F (54-60°C), it’s time to pour it into your mold or container. Pour slowly and steadily to avoid air bubbles. Leave a little room at the top of the container for the wax to expand as it cools. If you’re making a multi-layer candle with different colors or scents, let each layer cool before adding the next.
Step 6: Let the Candle Set
Allow the candle to cool completely before removing it from the mold or moving the container. This usually takes 4-6 hours, depending on the size of the candle. To prevent surface imperfections, it’s a good idea to cover the candle as it cools to avoid drafts.
Step 7: Trim the Wick
Once your candle has fully cooled and set, trim the wick to about 1/4 inch above the surface of the candle. This ensures a clean burn and prevents the wick from becoming too tall, which could lead to an uneven burn or excessive soot.
Troubleshooting Common Issues
Even experienced candle-makers face challenges along the way. Here are some common issues you may encounter and how to solve them:
- Air Bubbles: These can occur during pouring, but they can be minimized by pouring slowly and ensuring the wax is the right temperature. You can also use a toothpick to pop bubbles before the wax fully sets.
- Cracking: Cracks on the surface of your candle may appear if the wax cools too quickly. To prevent this, pour the wax at the right temperature and allow it to cool slowly, away from drafts.
- Uneven Burning: If your candle is burning unevenly, it could be because the wick is too small or the wax was not properly blended. Ensure you’re using the right wick for your container size, and always follow the recommended pouring temperatures.
- Soot: Excessive soot can result from using a wick that’s too large or if the candle is not burned properly. Trim your wick regularly to avoid this issue.
The Benefits of Candle-Making
Candle-making is a fun and therapeutic activity that brings many benefits:
- Creativity: You can experiment with colors, scents, and shapes to create unique pieces that match your personal style or home decor.
- Relaxation: The process of making candles can be incredibly soothing and a great way to unwind.
- Customization: You can create candles for special occasions, holidays, or as personalized gifts. Nothing says “I care” like a handmade candle.
- Sustainability: By using natural waxes and eco-friendly materials, you can create candles that are better for the environment.
Opinions from Candle-Makers Around the World
- Olivia, 32, USA: “I started making soy candles as a hobby, and it quickly turned into a small business. I love experimenting with different scents and creating personalized gifts. It’s a rewarding process!”
- David, 50, UK: “I’ve been making candles for years, but I’ve recently switched to beeswax. The scent is so much more natural, and I love the slow burn. There’s definitely a learning curve, but it’s worth it for the quality.”
- Akira, 45, Japan: “Candle-making is a great way to unwind after a busy week. I enjoy the meditative aspect of it, and the candles I make are often used in our tea ceremonies. It’s all about the atmosphere.”
- Sofia, 27, Argentina: “I’ve been making candles for a few months now. The biggest challenge for me has been choosing the right wick. After a few tries, I’ve found the perfect fit, and now my candles burn beautifully.”
- Carlos, 60, Spain: “Candles have always been part of my life—whether for religious purposes or as a way to create a cozy atmosphere. Making them myself gives me a deeper connection to the process and the end result.”
Final Thoughts
Candle-making is more than just a craft—it’s an opportunity to express yourself and create something beautiful and functional. Whether you’re looking to add a touch of light to your home, create personalized gifts, or start a business, candle-making is a skill that rewards patience and practice. By following the steps above and keeping a few key tips in mind, you’ll be well on your way to creating stunning candles that not only look good but also work beautifully.
Remember, like anything in life, there will be a few bumps along the way. But as with most things, with a little practice and a lot of passion, you’ll soon be crafting candles like a pro. So light up the world—one handmade candle at a time!


