
French braiding has a certain elegance to it, doesn’t it? From its roots in the 19th century (pun intended), this hairstyle has traveled through time and across cultures, becoming a staple in many people’s hair routines. Whether you’re heading to a fancy dinner, sweating it out at the gym, or simply want to keep your hair out of your face while you go about your day, the French braid is a versatile and chic solution. And guess what? Learning how to do a French braid isn’t as difficult as it may seem, even if you’re starting from scratch.
In this guide, we’ll walk through every step of creating a classic French braid, starting with the basics. Plus, we’ll dive into some tips, tricks, and common pitfalls. After all, experience matters – and when you’ve been around as long as I have, you learn how to braid not only hair but also the nuances of life. So let’s get started.
What Exactly is a French Braid?
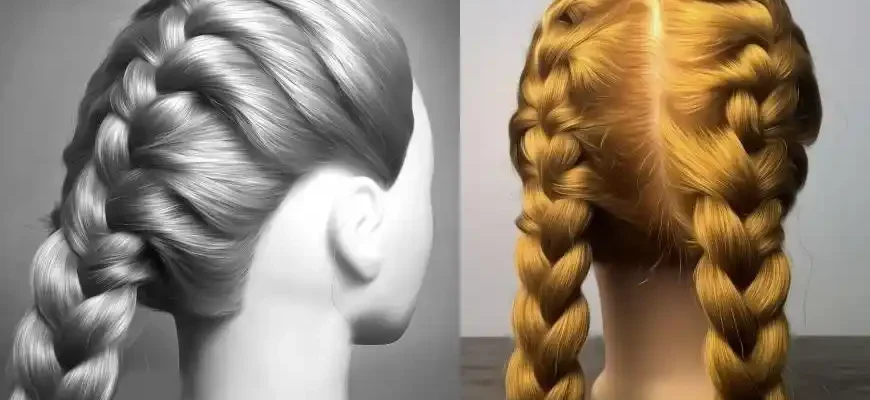
Before we dive into the nitty-gritty, let’s define what a French braid actually is. At its core, it’s a plait (braid) that begins at the crown of your head and gradually incorporates sections of hair as you go down, creating a neat, intertwined look. Unlike a regular braid, where you start with three strands and simply weave them together, a French braid involves gradually adding hair from the sides as you work your way down the head.
This braid gets its name from its association with French fashion and beauty trends, though it has been popular in many cultures. It’s sophisticated yet practical, a perfect balance between function and style.
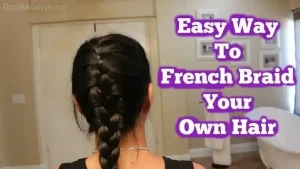
Step-by-Step Guide to French Braiding Your Own Hair
1. Prepare Your Hair
Start with clean, slightly damp hair. Dry hair can be tricky to braid because it tends to slip and may cause the braid to fall apart. If you have particularly slippery or fine hair, a little dry shampoo or texturizing spray can help add some grip. If your hair is freshly washed, you might want to wait for it to air dry a bit or use a blow dryer, but don’t let it get completely dry. A little bit of moisture makes braiding easier.
2. Part Your Hair (Optional)
You can choose to part your hair wherever you prefer – down the middle, to the side, or keep it all together without a part. If you want a neat, symmetrical look, a center part might be best. But remember, this is about your personal style, so don’t feel like you have to follow the rules too strictly.
3. Start the Braid
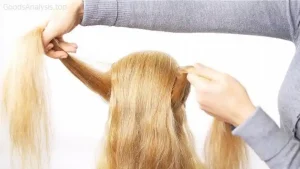
Take a small section of hair at the top of your head, right where your hairline begins. Divide it into three equal strands. Hold the right strand in your right hand, the left strand in your left hand, and the middle strand in between.
Now comes the French twist: as you begin your regular braid, you’ll add more hair to each section before crossing it over. Start by crossing the right strand over the middle one, then the left strand over the middle. Here’s where the French aspect kicks in: as you do this, gather small sections of hair from either side of your head and add them to the strands before crossing them over.
4. Add Hair as You Go
As you continue, keep adding small sections of hair from both sides to the braid. Imagine you’re making a waterfall down your head with each new strand. Keep the braid tight and close to your scalp for that clean, polished look. If you prefer a looser, more bohemian style, you can ease up on the tension, but be careful not to let the braid unravel.
5. Continue the Braid Down
Once you run out of hair to add from the sides, you’ll continue braiding normally, as you would with a regular three-strand braid. Keep your hands in the same position, and don’t forget to check for symmetry as you go. Depending on how long your hair is, you can either finish the braid at the nape of your neck or continue all the way down to the ends of your hair.
6. Secure the Braid
Once you’ve braided your hair to the desired length, secure the end with a hair tie. You can use a clear elastic for a more discrete look, or go for a colored tie for a pop of fun. If you want a slightly more textured, lived-in look, gently pull on the sides of the braid to loosen it up a bit.
7. Finishing Touches
You can add a touch of hairspray to hold everything in place or finish off with a light texturizing spray to give your braid some volume. If you prefer a more boho vibe, leave a few wisps of hair around your face. Voila! You’ve got yourself a stylish French braid.
Common Mistakes and How to Avoid Them
While the French braid is a classic, it’s not without its potential pitfalls. Here are a few common mistakes to watch out for:
- Uneven Sections – If your sections of hair are too big or too small, your braid won’t look as smooth. Keep your sections small and even for the most uniform look.
- Tension Issues – Too tight, and your braid can look stiff and uncomfortable. Too loose, and it might fall apart. Finding the right balance is key.
- Getting Tangled – Especially for those with longer hair, tangling can be a real issue. Make sure to gently detangle your hair before you begin, using a wide-tooth comb or your fingers.
- Strand Slippage – If your hair is especially slippery or fine, use a bit of texturizing spray to keep the strands in place. Avoid over-wetting your hair, as that can cause slippage as well.
- Braiding Too Fast – Rushing through a French braid might lead to a lopsided or uneven result. Take your time, and focus on adding hair symmetrically from both sides.
Advanced Variations of the French Braid
Once you’ve mastered the basic French braid, you can experiment with more complex variations like:
- Reverse French Braid (Dutch Braid): Instead of adding sections on top of the middle strand, you add them underneath. This creates a braid that “pops” out, rather than lying flat against your scalp.
- Fishtail French Braid: A fusion of a fishtail braid and French braid, where you use the same technique but divide your hair into smaller, thinner strands.
- Side French Braid: Start your French braid from one side of your head and braid it down to the other side for a stylish, asymmetrical look.
Opinions from Real People

- Anna, 25, USA: “I’ve been French braiding my hair for years, but I’ve only recently started adding accessories like pins and flowers. It gives the braid a whole new level of fun. But my hair’s so thick that I have to make sure the sections are really even, otherwise the braid gets messy fast!”
- Samir, 42, India: “I used to find the French braid so tricky, but I realized it’s all about the technique. It’s not just about the braid – it’s about the way you hold your hair. Once I figured out the grip, it became way easier.”
- Isabella, 59, Italy: “I love a good French braid, but with my short hair, it’s almost impossible to do the classic version. I’ve learned to adapt by doing smaller braids instead, so I still get that elegant, sophisticated look, even with less length.”
- Carlos, 32, Brazil: “Honestly, I never really saw the appeal of French braids until my girlfriend taught me how to do one for her. I’ll admit, it’s pretty satisfying to create something that looks so intricate but is actually fairly simple once you get the hang of it.”
- Lina, 48, UK: “I find French braids so versatile. I wear them for work and leisure. The trick is patience and practice. Don’t get discouraged if it doesn’t work the first few times – it’s like any other skill.”
Conclusion
Mastering the French braid is a rewarding and useful skill that can take your hair game to the next level. Whether you’re doing it for practicality or for flair, a French braid always adds a touch of sophistication. Keep practicing, avoid the common mistakes, and soon enough you’ll be French braiding like a pro.
Remember, the world of braids is full of creativity, so feel free to experiment. There are no strict rules – only what makes you feel good and confident. If you get stuck, there are plenty of online tutorials and videos that can help you refine your technique. Happy braiding!


